The whir of a new grind, the sputter of a coffeemaker, the smell of a fresh brew; in a family of avid coffee drinkers, these are among the regular comforts of home life. For much of my life, I didn't understand the allure; I had always found the smell to be a bit off-putting, and never particularly enjoyed the flavor, no matter how well it was masked. One night in college, this chapter came to an abrupt end. In a single moment, as if the universe finally decided to end the cruel joke, that previously unpleasant smell grew intoxicatingly alluring. From that point forward, I loved coffee, and not just any coffee—strong coffee. In the weeks leading up to this build, I had heard quite a few things about cold-brew coffee, but hadn't yet come upon the opportunity to try it. Enticed by the promise of a smooth, sweet-tasting, exceptionally strong brew (!!) without any discernible acidity, I was excited to make some. And with the holidays quickly approaching, this seemed like the perfect gift-giving opportunity for my coffee-loving clan.
Cold brewing: how is it any different?
Most conventional brewing methods, in attempt to extract as much flavor as possible in the shortest acceptable amount of time, introduce heat, pressure, or both into the brewing process, while modulating the coffee-to-water contact area (by way of grind size) to strike a favorable balance between the two. Cold-brewing, as done here or by other methods (see below), takes a very different approach: seeking to maximize flavor at the expense of exceptionally long brew time. The advantages of this become readily apparent with a little experimentation.
Though flavorants and odorants take longer to be extracted from the beans at low brewing temperatures, they are given more time to do so; here, over roughly 8 hours. At low temperatures, however, a different subset of flavors contained within the beans are extracted, some probably unique to cold-brewing (i.e. those that would have been denatured, oxidized, or otherwise modified at higher temperatures).
A drip-rate too high (brew times significantly shorter than 8 hours), results in a brew that is under-extracted, weak, and lacking complexity. A drip rate too low might allow the coffee to warm to room temperature and experience greater oxidation in the room air, resulting in bitterness akin to that of drip coffee that sat out all afternoon. While this won't happen as quickly as for coffee that was hot to begin with, it will eventually happen. For these reasons, starting with ice water (as much ice as can fit, with cold water to fill the gaps) is helpful, and allows for a greater margin of error.
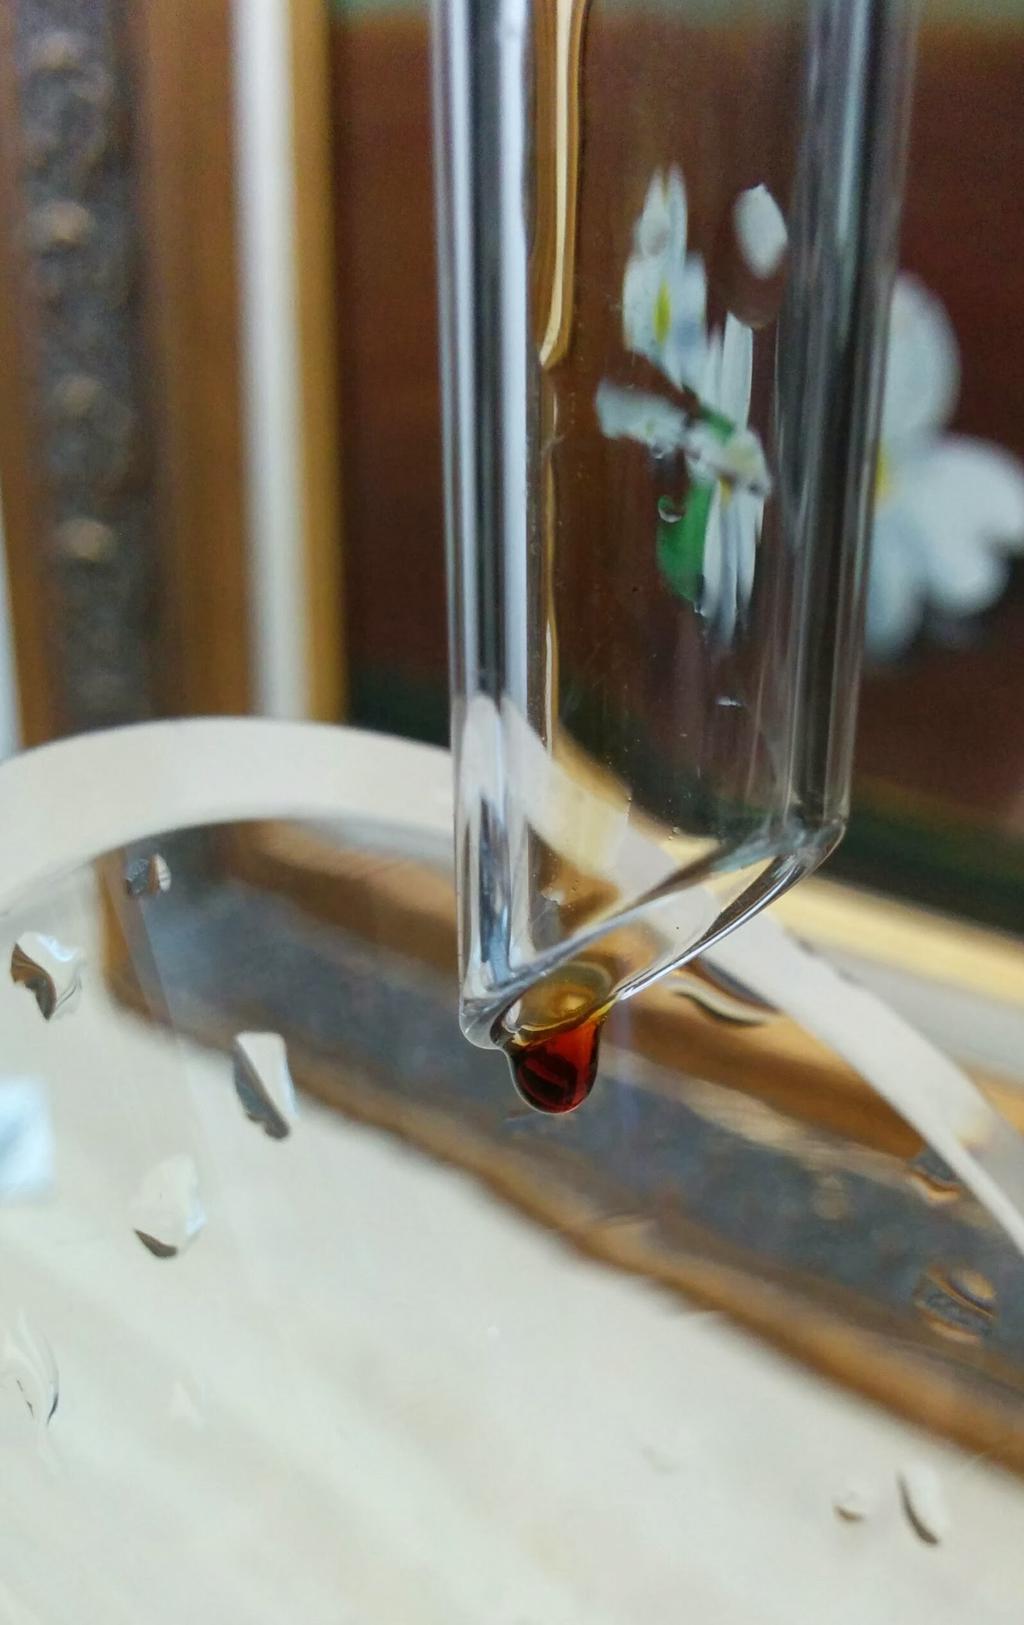
Also of note, drops that pass through the grounds later into the brewing process, which are oily and sweet, taste quite different from those at the beginning of the process, which have more intense 'coffee flavor,' are earthier and are 'buzzier'. The combination of all these flavors are what makes cold brew so magical. Stop your brew too soon (or rush it) and you'll miss out.
How did I do it? Isn't there an easier way?
I'll tackle these in reverse. This is definitely not the only way to make cold-brew, and it's far from the most practical, but it is pretty, and for a gift, that counts for a lot. A few alternatives that I've used, and that admittedly do a great job, include a pitcher specifically designed for making cold-brew (like this one from Takeya) or a French press (like this one from Bodum)—though the pitcher will tolerate a finer grind than the French press, resulting in slightly stronger coffee. For either of them, fill with coffee grounds and cold water, place in the fridge overnight (or longer), and enjoy the next day. Since they are going directly into the fridge, using warm (not hot!) water is okay, and will speed things up a little.
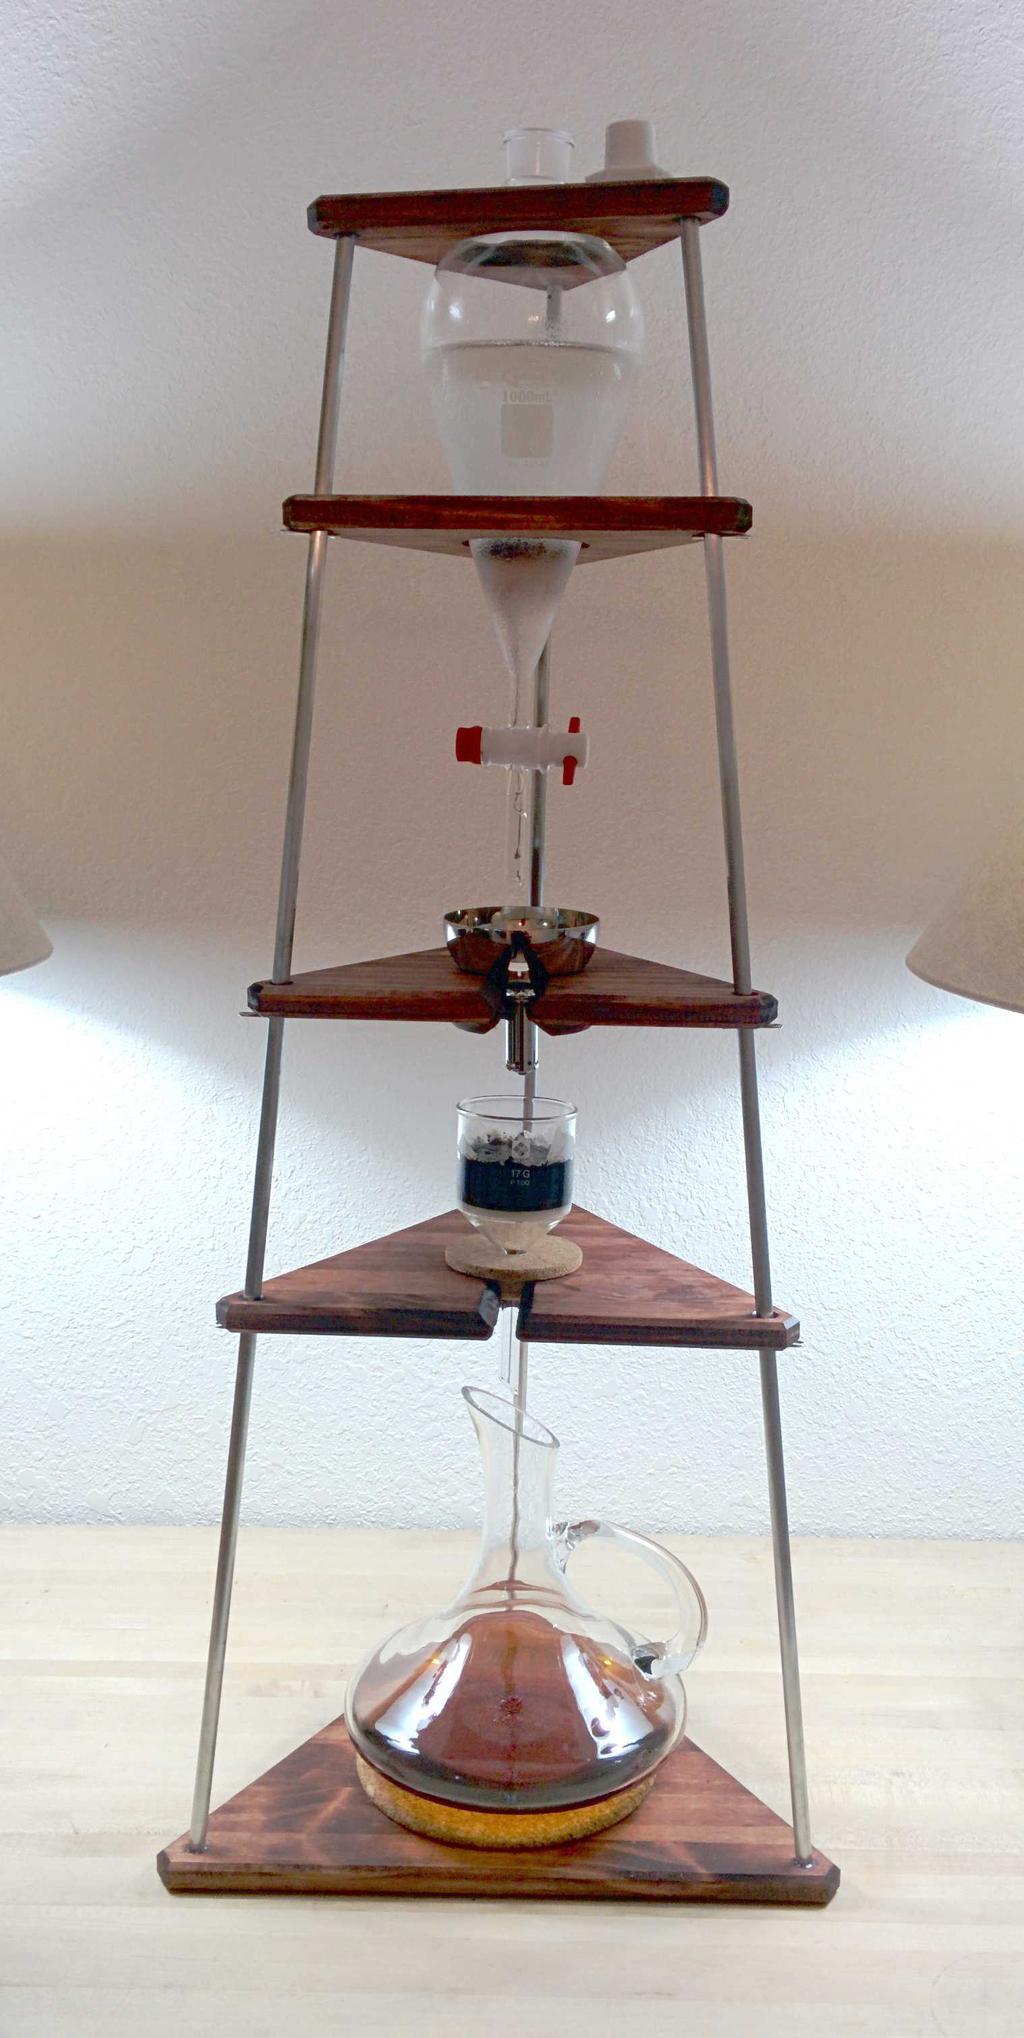
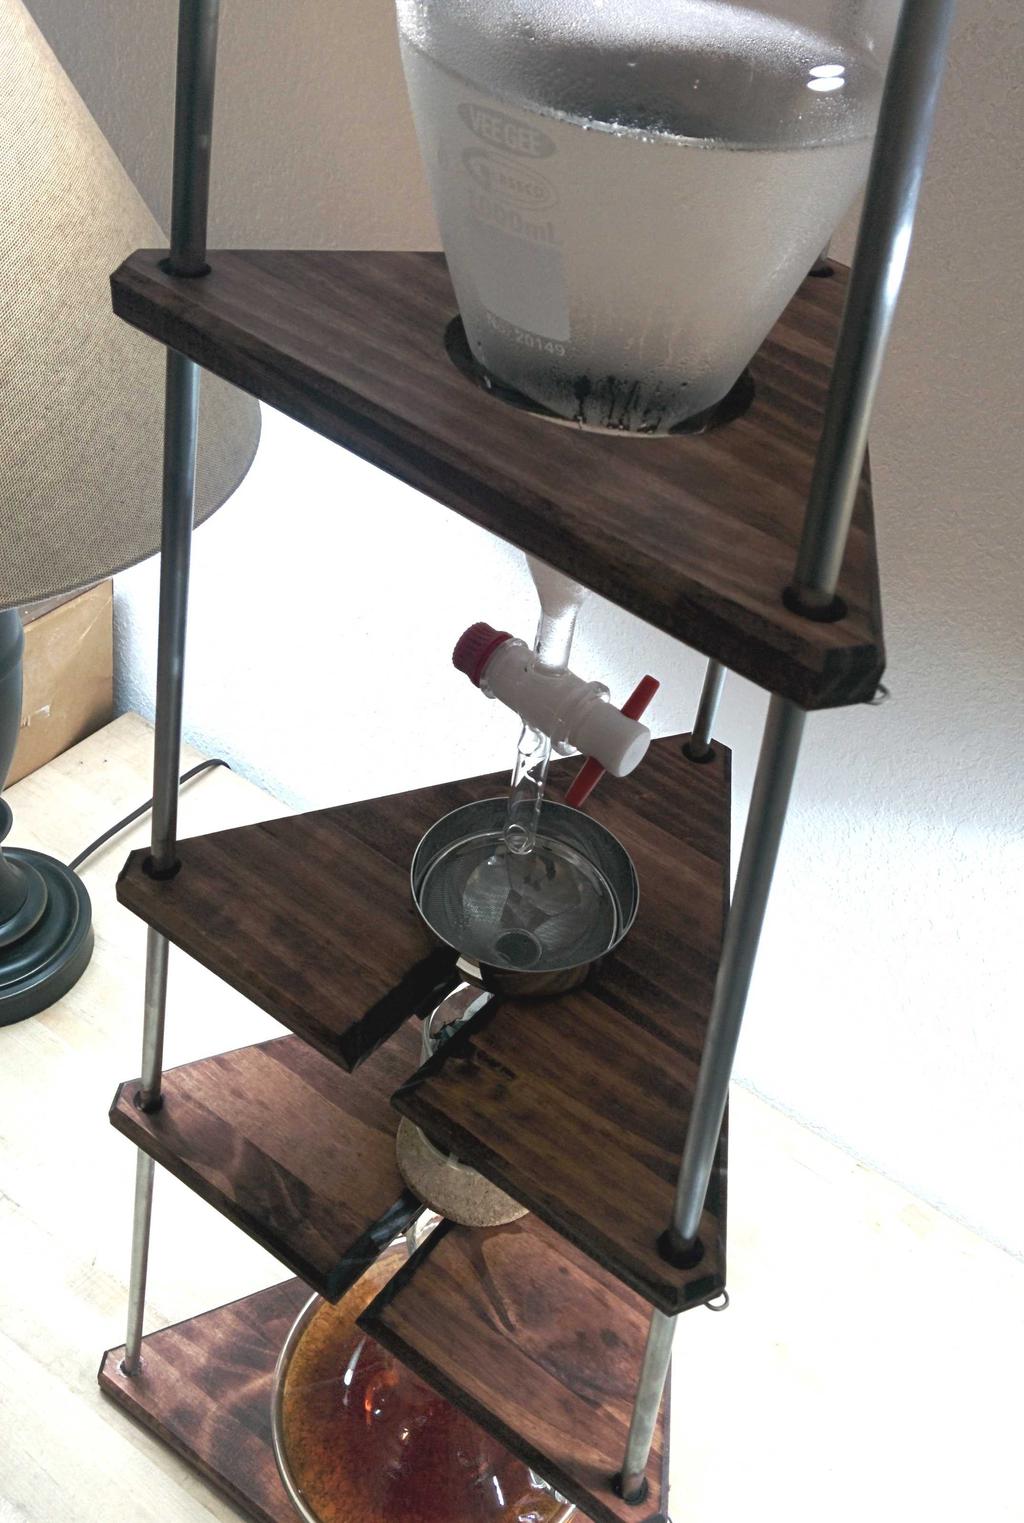
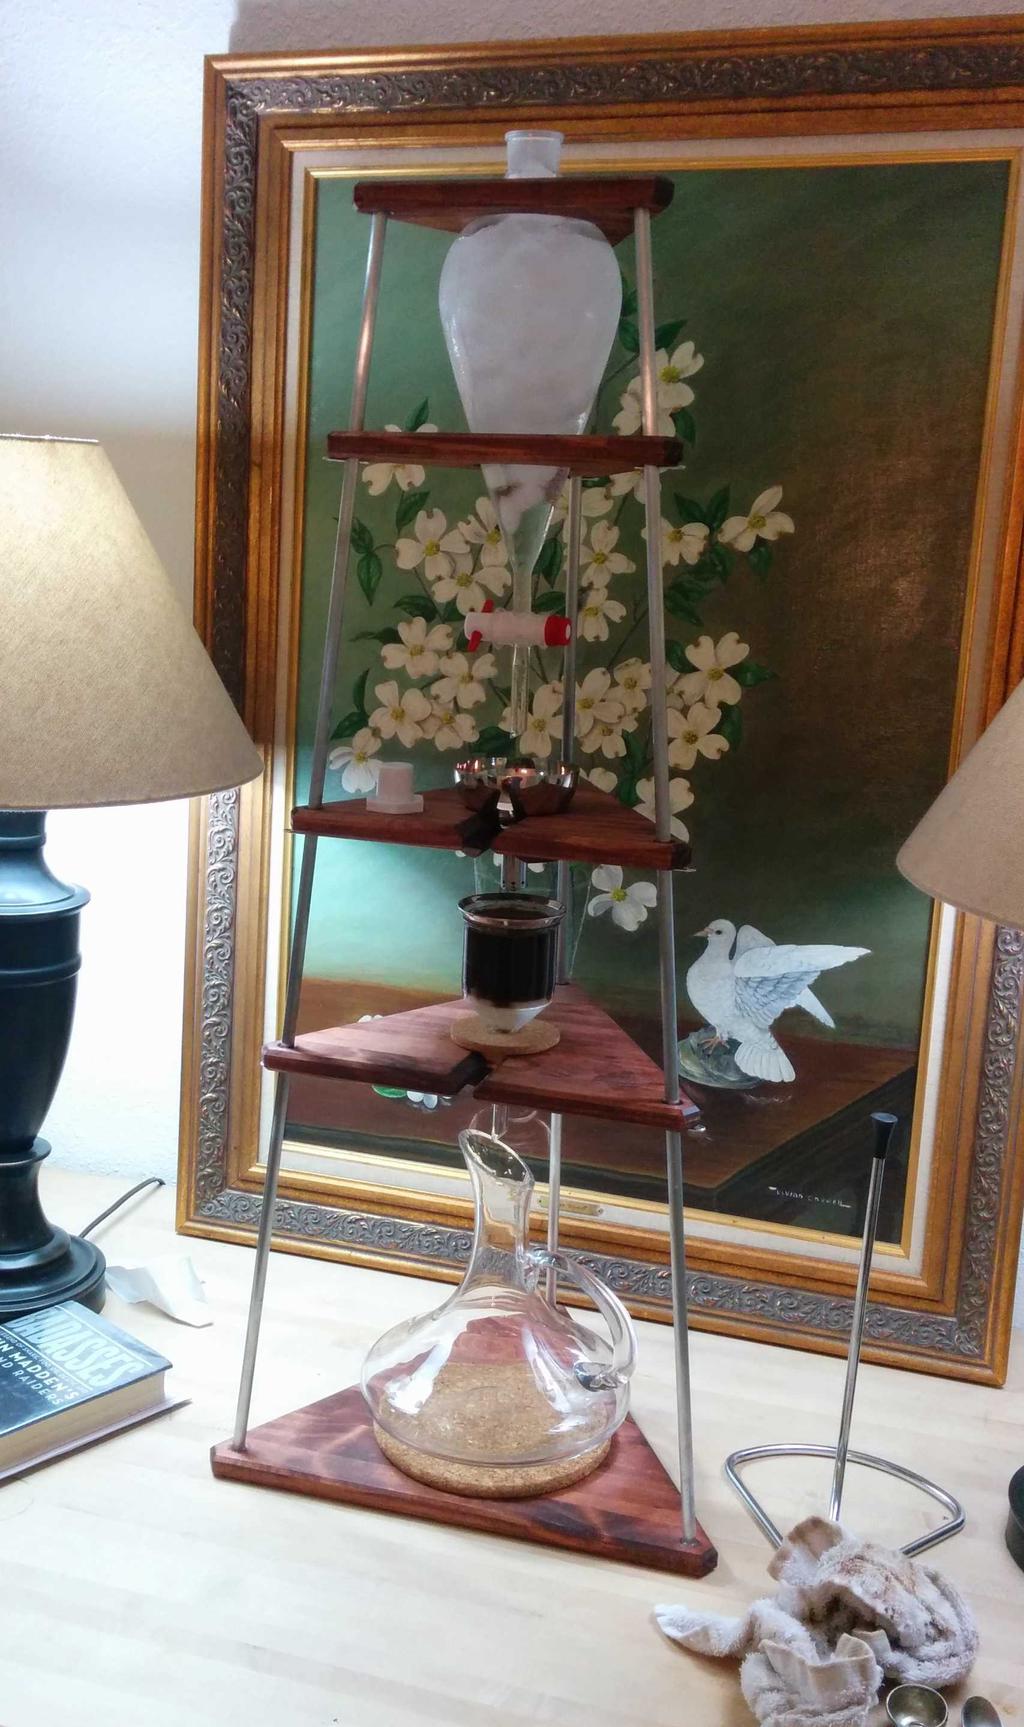
In the apparatus I built, ice-cold water is held in a reservoir at the top and dripped slowly through a series of stages, first through a wine funnel aerator, then into a fritted glass buchner funnel containing coffee grounds, and finally into a wine decanter at the bottom. I chose materials that are safe for contact with a beverage—either materials meant specifically for contact with beverages, or labware made from food-safe materials and designed to be chemically nonreactive—preferentially choosing ones made from glass, so that the long brewing process could be observed and so that the apparatus could be easily sanitized.
Water
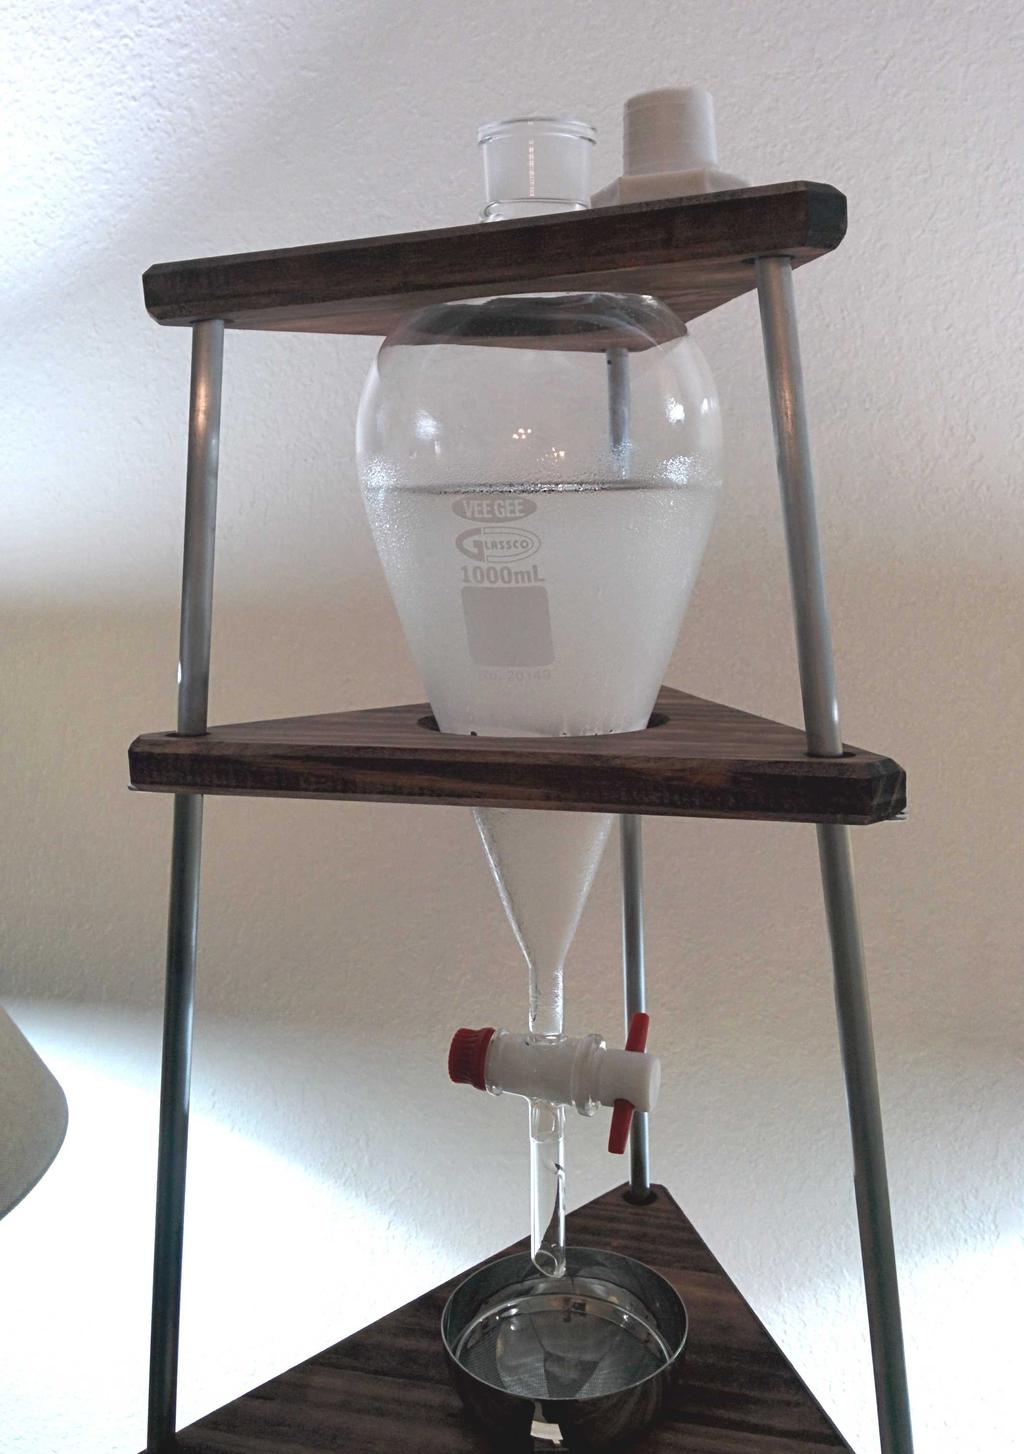
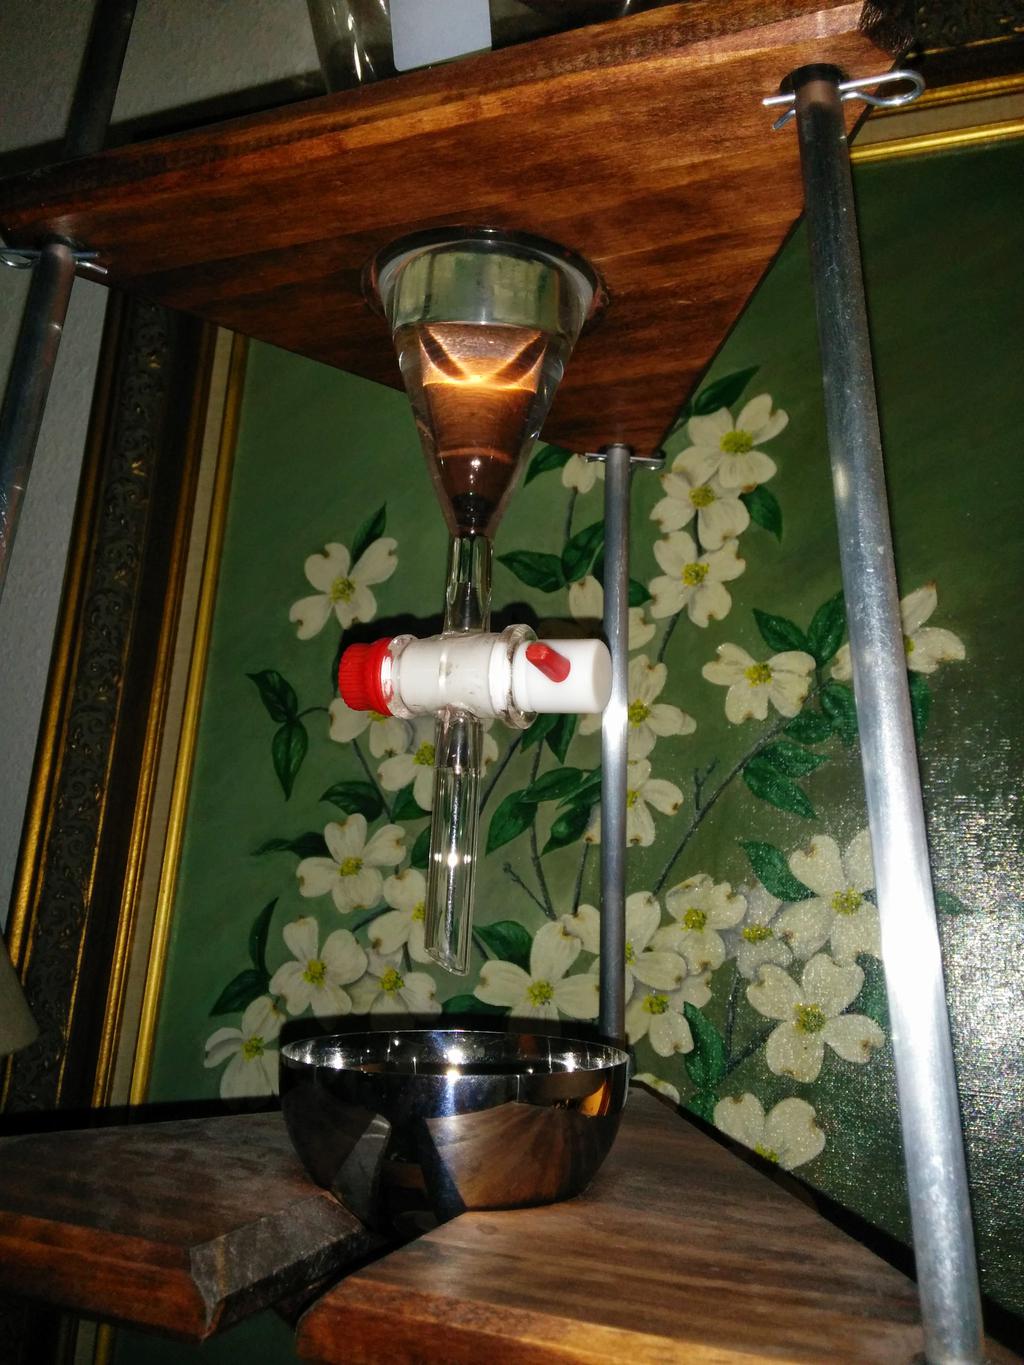
For the reservoir, I used a 1 L glass separatory funnel with a PTFE* stopcock (Vee Gee 20149-1000), for its integrated means of drip control. Though seemingly ideal, this choice does come with a few downsides. While the stopcock provides for good adjustability of the flow rate, the sub-drop/s range we aim for is at the bottom of its adjustability range, and thus requires a really fine touch. Additionally, as the separatory funnel is so tall, the stopcock needs to be adjusted several times (usually 3) throughout the brewing process to keep the liquid flowing as the head pressure (liquid level) drops. If you're building one for yourself, choosing a wider, shorter reservoir would minimize this issue; controlling the flow rate directly (e.g. by peristaltic pump) is another option, at the expense of increased complexity and of making the apparatus more difficult to clean.
*While PTFE (teflon) isn't exactly safe at high temperatures, at low temperatures, it's totally safe.
Coffee Grounds
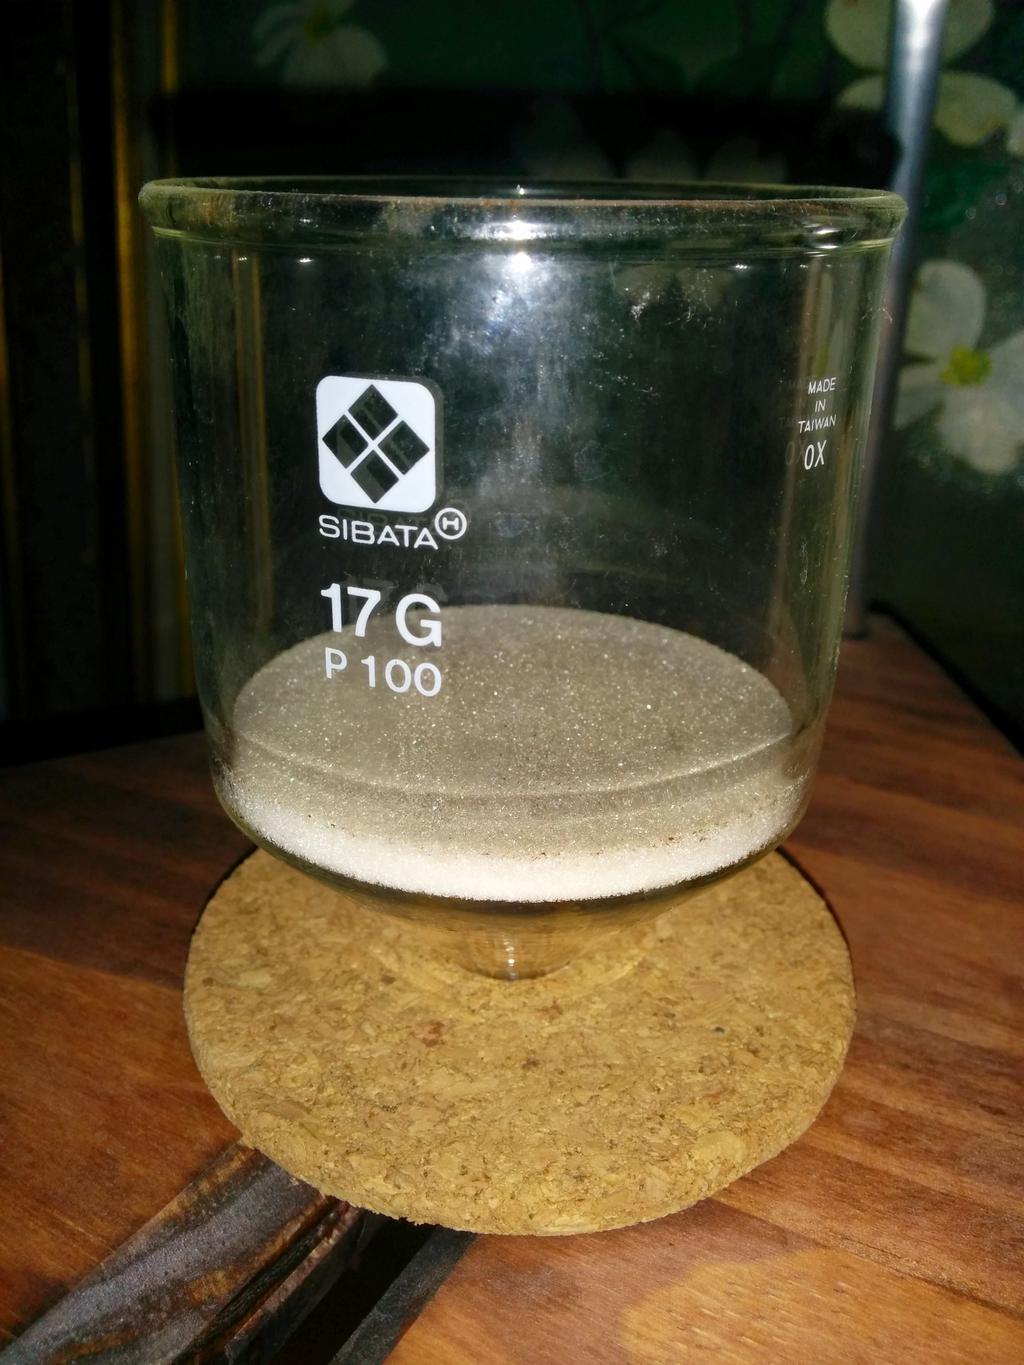
I wanted to avoid using disposable filters, as I didn't want to keep buying them (and disposing of them), and because they absorb some of the oils from the coffee and have a negative impact on flavor. I used a fritted glass buchner funnel with 40-100 µm pore size (Sibata 1311-17100) instead, both to filter and contain the coffee grounds. This allows for a really fine grind size without allowing even a single ground to pass, and is easy to clean.
Initially, I had hoped that a wine aerator (I used this one), with a number of outlet holes spaced evenly around the circumference of the stem), placed between the water and coffee grounds, would help to better distribute the individual water drops over the surface of the coffee grounds. In practice, this wasn't all that effective. If the stem of the aerator is centered exactly below the falling drop, and is perfectly level with the ground, then the falling drops do indeed separate and fall evenly from each of its outlets, distributing the water as intended; if even slightly misaligned, the drops all fall from one of the outlets. If I were building this again, I'd leave it out. What does work well is to place a round of filter paper atop the coffee grounds, as capillary action wets entire filter paper, and wicks into the coffee evenly from there. While this doesn't eliminate the use of filter paper, it also doesn't have any impact on flavor, as it comes in contact with the water before it steeps through the coffee. I used these.
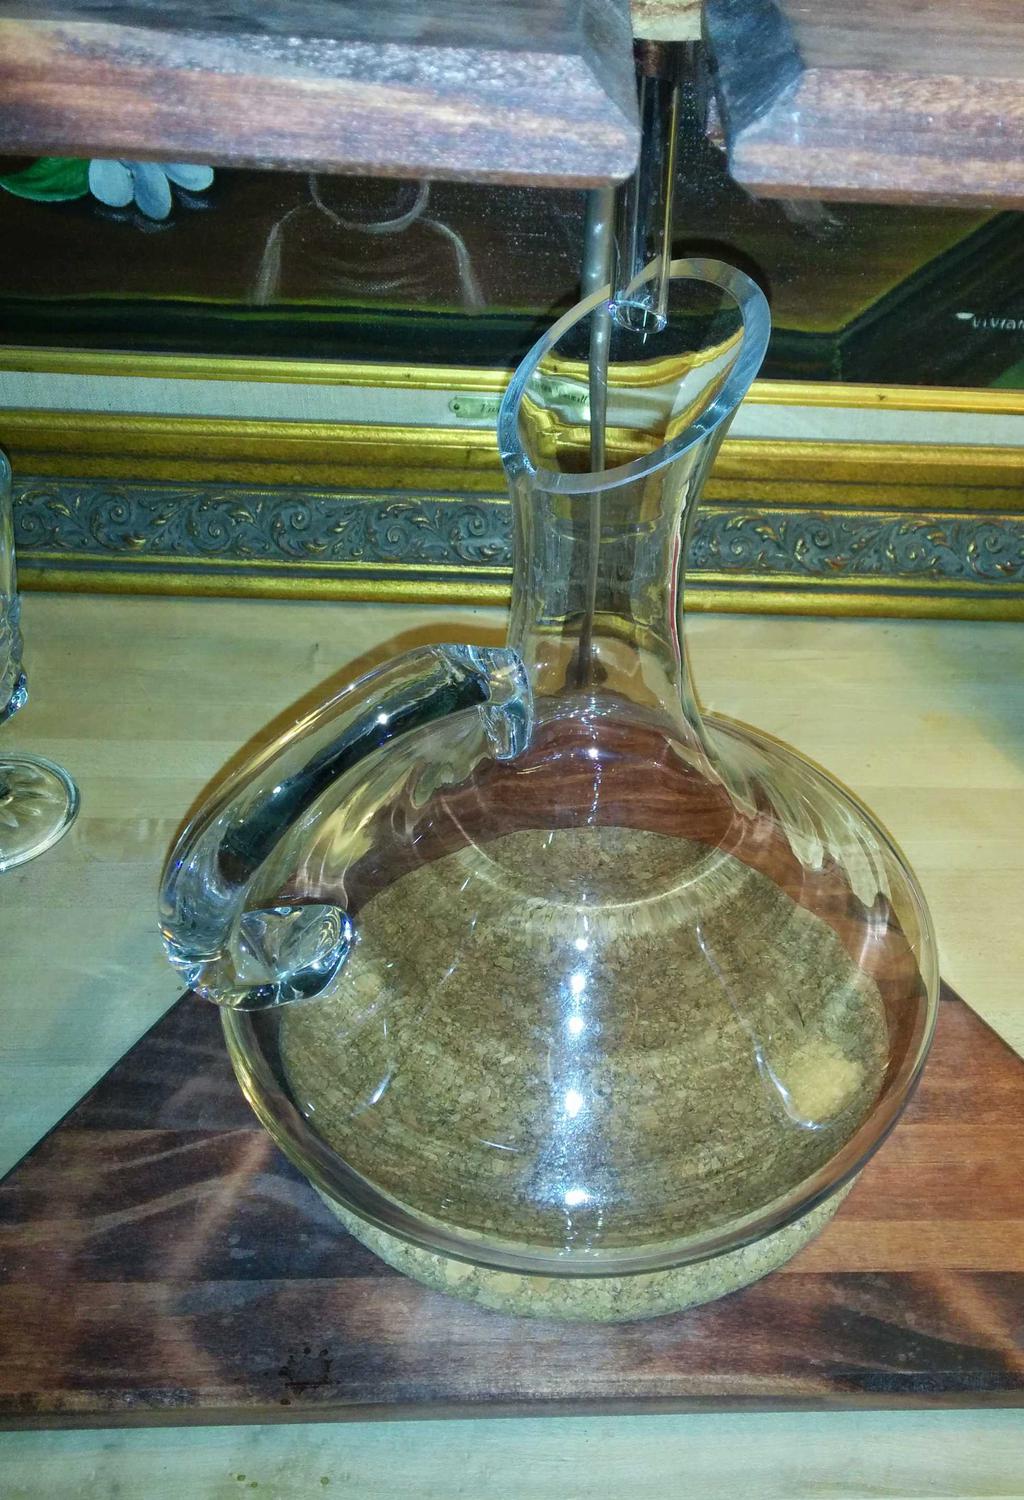
Liquid Gold
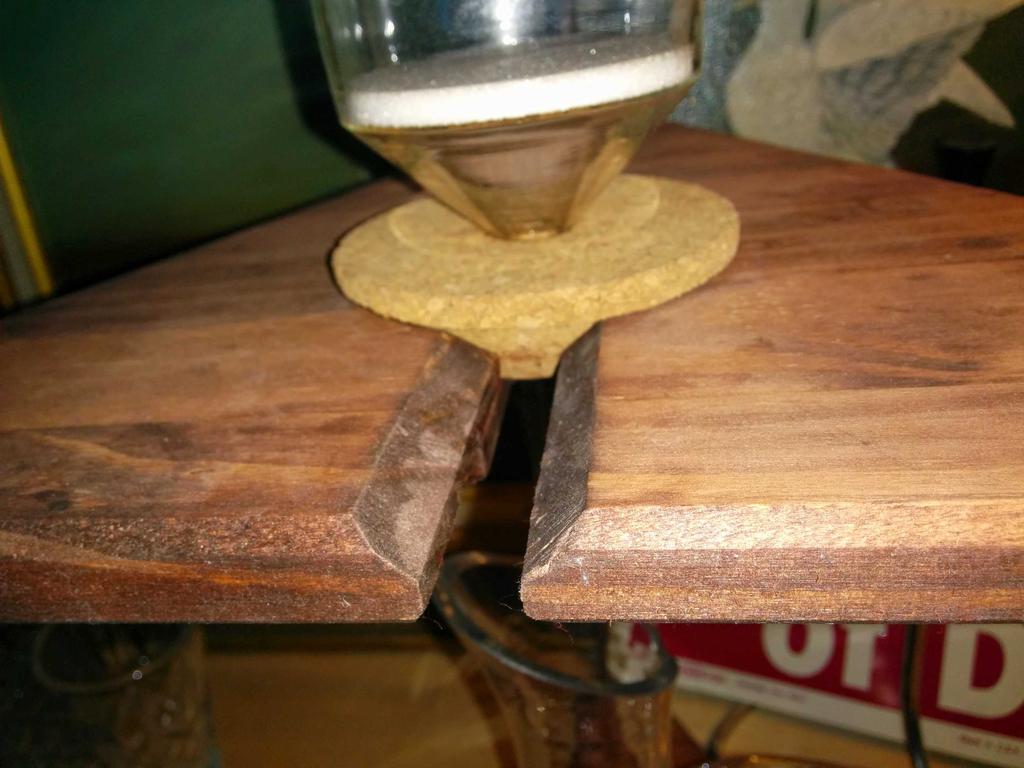
At the bottom of the stack, I used a 52 oz. wine decanter (this one). It's glass, it looks good, and it works. I set that on a round 7" cork trivet (IKEA 870.777.00), placed on the bottom platform.
Structure
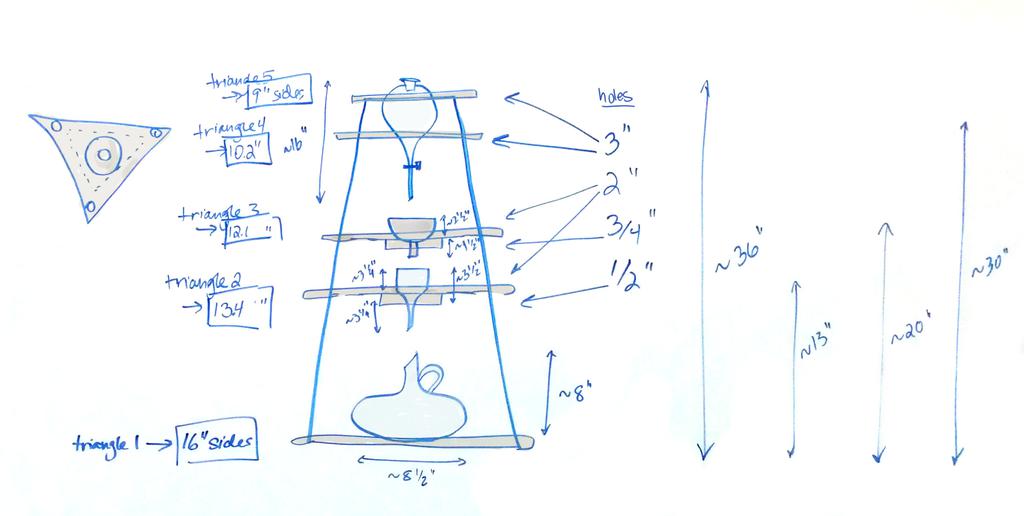
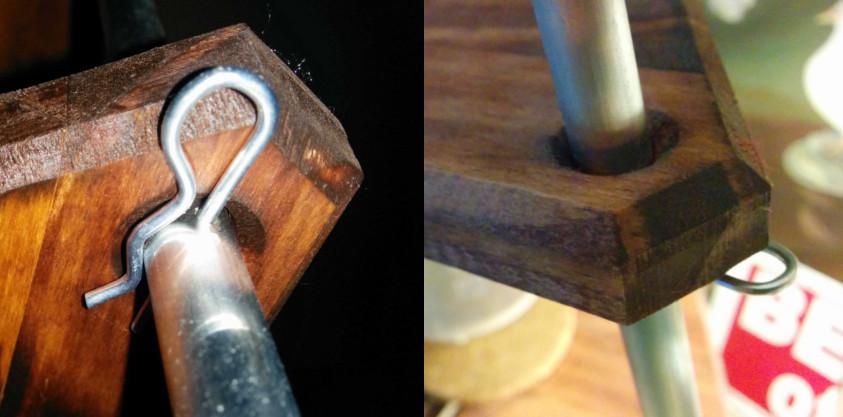
The structure was made from wooden triangles cut from a 2 ft x 4 ft sheet of 3/4edge-glued poplar (Home Depot), three 3/8
x 36" aluminum rods (Home Depot), and nine small hitch pins (from a $7.50 Harbor Freight assortment), one per rod below each of the middle three triangular platforms, to hold them in place. Lastly, a cork carafe topper (from IKEA, for the LÖNSAM carafe, which has since been discontinued) with a hole drilled through the center was used below the buchner funnel to hold it in place.
To make the cuts, I primarily used a circular saw and jigsaw; for the edge chamfers, a router and 45° chamfer router bit; for the holes, a drill-press (along with a self-centering drill press jig like this one to keep the rods from rolling while drilling holes through their diameter for the hitch pins, and a few small drill bits, spade bits, and large hole-saws).
Brewing
Place the decanter at the bottom. Fill the buchner funnel with finely-ground coffee, a little bit at a time, wetting it slightly as you go (wetting all of the coffee ensures that the water falling from above more-evenly steeps through the grounds). Fill the reservoir with as much ice as possible, and then with water the rest of the way. Adjust the stopcock to achieve a drip-rate of around 2 drops every 3 seconds (assuming a drop size of around 50 µL, this should empty the 1 L reservoir in around 8 hours), and check back every few hours, adjusting the drip rate as necessary.
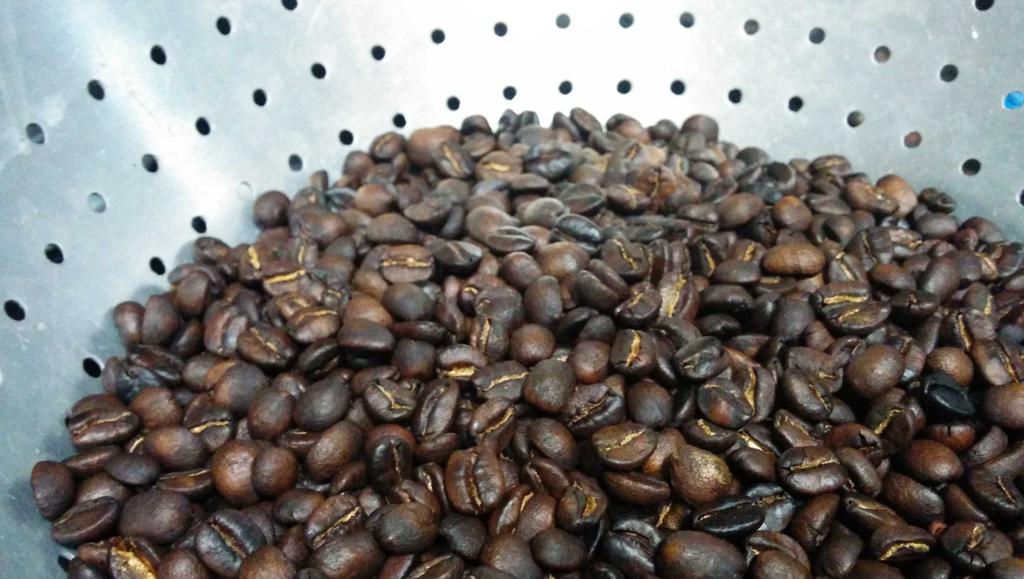
Also note that while this does, in principle, work with any coffee, freshly (burr) ground, high quality coffee will taste vastly better than the cheapest pre-ground coffee you can buy. A $20 roaster like this one (which comes with 4 lb of free green coffee beans) and a cheap burr grinder will go a very long way.
To leave a comment below, sign in using Github.