Introduction
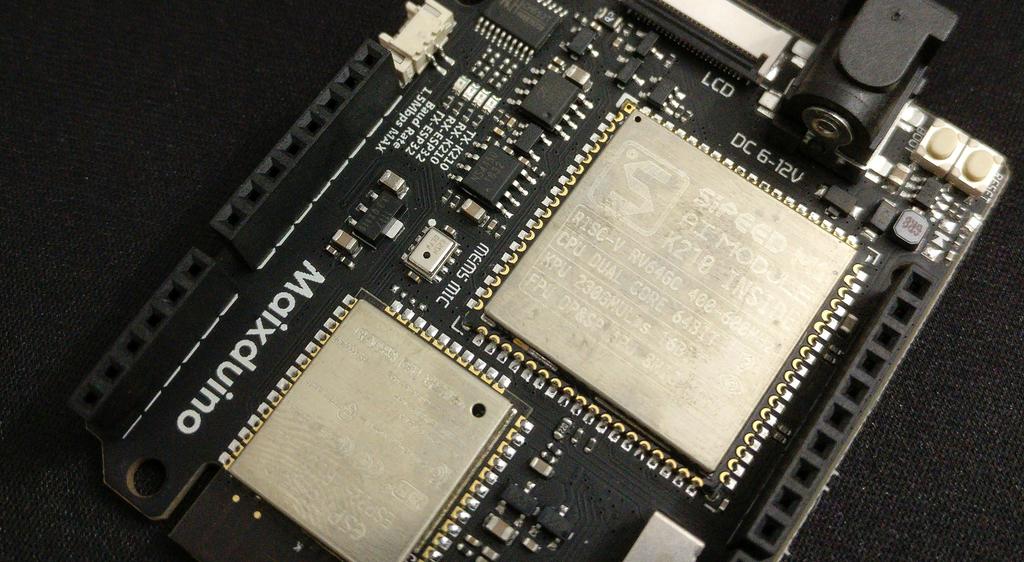
When I first heard about the Sipeed Maixduino AI Kit, I was really excited. At a dime shy of $24, you get a resistive-touch 2.4-inch TFT LCD, OV2640 2 MP camera, and development board built around the Sipeed M1 and ESP32 modules, packing a dual-core, 64-bit 400–800 MHz RISC-V CPU—with FPU, FFT accelerator, audio accelerator (APU), capable CNN neural network accelerator (KPU), and highly-configurable GPIOs—WiFi 802.11 b/g/n and Bluetooth 4.2/BLE provided by the ESP32, on-board MEMs microphone, stereo DAC and power amp, SD-card slot, and USB type C with CH522 USB-TTL. It's programmable in MicroPython (using the MaixPy Firmware) or C/C++, using either the Arduino ecosystem and libraries (using the Maixduino Firmware), FreeRTOS, or the bare-metal SDK.
The real star of the show is the KPU, with performance on the order of 0.25–0.5 TOPS at < 1W power consumption, support for 1x1 and 3x3 convolutions, batch-normalization, pooling, and (arbitrary) activation operations, no direct limits on layer number or layer size, and that is capable of running networks like mobilenet and tiny-YOLOv2 in real-time at QVGA or VGA resolutions. Models can be trained on any system—using Tensorflow, Keras, or any other framework that can be compatibly cross-compiled—and converted and quantized to run on the device using the Kendryte Model Compiler. Models with parameter sets up to 5.9 MiB will run at or above 30 fps; larger networks (up to the flash size) will run more slowly.
With the board in hand, the first thing I wanted to do was get one of the demos working, to get a feel for the software and tooling and to verify that it actually works. Here, I'm describing the steps I took to get that demo, a pre-compiled tiny-YOLOv2 face-detection network (that detects one or many faces) working with the MaixPy firmware. Later on (perhaps in a subsequent post), I'll train one from scratch to run on the device.
Getting Started
Packages
I'm running Ubuntu 19.04, and use python3, pip3, wget, tar, zip, and unzip below. If there's any you don't have installed, the package manager on any modern distribution should have them (if you aren't running some flavor of unix, Google is your friend).
Make and enter the project folder
mkdir maixpy_test
cd maixpy_test
Initialize and source a virtual environment
python3 -m venv ./venv
source ./venv/bin/activate
Install ampy via pip
Ampy is a neat little command-line tool from Adafruit for manipulating files on a MicroPython board over a serial connection, supporting commands like ls, put, get, rm, mkdir, rmdir, reset, and run.
This should install ampy and its dependencies (in my case, adafruit-ampy-1.0.7, click-7.0, pyserial-3.4, and python-dotenv-0.10.3).
pip3 install adafruit-ampy
Download the latest firmware (minimum variant) and face model
Three variants of the MaixPy firmware are available:
full– MicroPython + OpenMV API + lvgl (an embedded GUI library) [2.2 MB]no_lvgl– MicroPython + OpenMV API [1.6 MB]minimum– MicroPython alone [833 kB]
Here we're downloading the minimum variant:
mkdir firmware
wget https://github.com/sipeed/MaixPy/releases/download/v0.3.2/maixpy_v0.3.2_minimum.bin -P ./firmware
We'll also download the face detection neural network model for testing (pre-trained Tiny Yolo-v2).
mkdir models
wget https://github.com/sipeed/MaixPy/releases/download/v0.3.2/face_model_at_0x300000.kfpkg -P ./models
Flash the firmware and face model using kflash_gui
Download and extract kflash_gui
wget https://github.com/sipeed/kflash_gui/releases/download/v1.3.2/kflash_gui_v1.3.2_ubuntu16.tar.xz ./
tar -xvf ./kflash_gui_v1.3.2_ubuntu16.tar.xz kflash_gui/
rm ./kflash_gui_v1.3.2_ubuntu16.tar.xz
Flash firmware
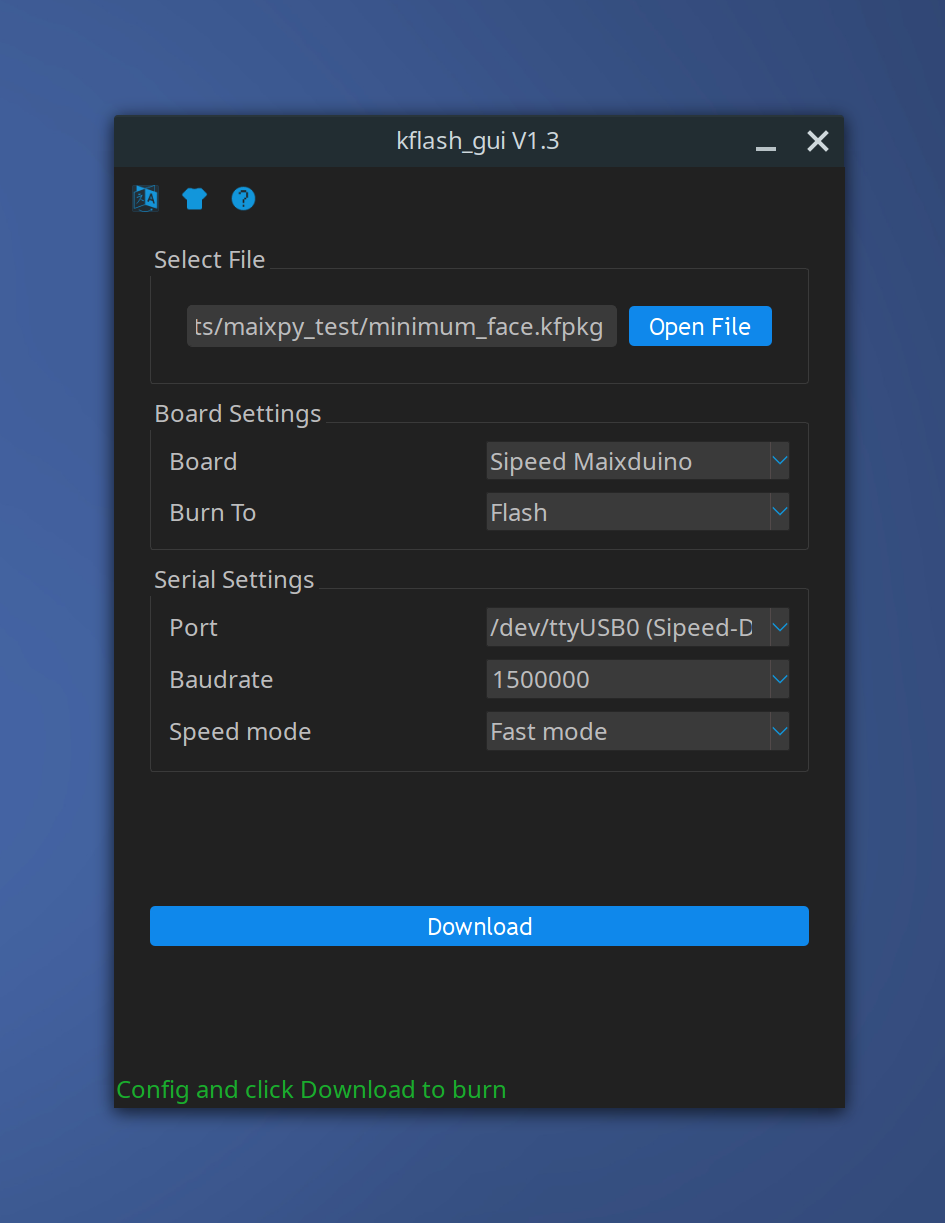
We're going to flash two files: maixpy_v0.3.2_minimum.bin and face_model_at_0x300000.kfpkg. To run the GUI:
kflash_gui/kflash_gui

Though /dev/ttyUSB0 (Sipeed-Debug) and /dev/ttyUSB1 (Sipeed-Debug) were both available as ports, only /dev/ttyUSB0 (Sipeed-Debug) worked, so I used that one.
I was unable to select both files using the 'open file' dialog (once I opened the second file, the first one disappeared), so I used the dialog for the first and typed the path of the second myself, making sure to type the offset correctly for the second (0x300000). Next, when trying to flash these, only the first would flash successfully, so I used the 'Pack to kfpkg' option to create a single file, and flashed that instead. This worked fine.
Note: If you get a permission denied
error, run the following, reboot, and try again:
Alternatively, you can run kflash_gui with sudo, but this should only be done with software that you absolutely trust.
sudo usermod -a -G dialout $(whoami)
Alternatively, flash the firmware using kflash.py
Though it's a little more work, I prefer this method over using the GUI due to its transparency.
Install kflash.py
pip3 install kflash
As kflash doesn't give the option to flash a file with an address offset, so we'll need to make a .kfpkg file ourselves.
Making a .kfpkg file
Package format
A .kfpkg package is just a .zip file with a custom extension, containing a few specific files:
flash-list.json–jsonfile describing the files included in our package (more on this below)*.binformatted firmware file*.*– other files that we'd like to flash (e.g. our model)
Potential snag and workaround
I did not have good luck placing an .kfpkg model file (like the one we downloaded above) directly into another .fkpkg package; the files would flash successfully, but when trying to access the models later on, I would get errors like this:
[MAIXPY]:find ov sensor
[MaixPy] reset | sensor->slv_addr = 60
[MAIXPY]: exit sensor_reset
v=1105938646, flag=1106856192, arch=1185892787, layer len=702694376, mem=1170883809, out cnt=1113997652
err: we only support V3 now, get V1105938646
[MAIXPY]kpu: kpu_model_get_size error -3
One of the things you need to specify when making the flash-list.json file is the memory address where the start of each file should be written, and I suspect that having a .kfpkg within a .kfpkg (each with a flash-list.json and defined addresses) resulted in the model being written somewhere other than where I wanted it to be. As for why this worked in the GUI, I'm not sure, and didn't think it would be worth the time to explore further (but if you're curious enough to dive into the source to find out, go for it).
Thankfully, our model .kfpkg file is, itself, just another zip file, so we can extract it to get the facedetect.kmodel inside, and use that instead.
unzip models/face_model_at_0x300000.kfpkg -d models/
The flash-list.json file
Our .kfpkg package will contain our firmware file, our model, and our flash-list.json. Our flash-list.json will look like this:
flash-list.json
{
  "version": "0.1.0",
  "files": [
    {
      "address": 0,
      "bin": "maixpy_v0.3.2_minimum.bin",
      "sha256Prefix": true
    },
    {
      "address": 0x300000,
      "bin": "facedetect.kmodel",
      "sha256Prefix": false
    }
  ]
}
Let's make our folder, copy our files to it, and create an empty json file:
mkdir minimum_face
cp firmware/maixpy_v0.3.2_minimum.bin minimum_face/
cp models/facedetect.kmodel minimum_face/
touch minimum_face/flash-list.json
Paste the above json into flash-list.json using your preferred editor, and save the file. Next, zip the folder and change the extension:
zip -rj minimum_face.zip minimum_face
mv minimum_face.zip minimum_face.kfpkg
Flashing the .kfpkg
First, determine the device name for your board (running ls /dev/ttyUSB* should give you a list of candidates), and flash the firmware:
kflash -p /dev/ttyUSB0 -B maixduino -b 1500000 minimum_face.kfpkg
Running the face detection test
Download the test file
For simplicity, we'll rename it to test.py.
wget https://raw.githubusercontent.com/sipeed/MaixPy_scripts/master/machine_vision/demo_find_face.py -O test.py
Here's what it looks like:
test.py
import sensor
import image
import lcd
import KPU as kpu

lcd.init()
sensor.reset()
sensor.set_pixformat(sensor.RGB565)
sensor.set_framesize(sensor.QVGA)
sensor.run(1)
task = kpu.load(0x300000) # remember the memory address defined in the json?
## task = kpu.load("/sd/face.kmodel")
anchor = (1.889, 2.5245, 2.9465, 3.94056, 3.99987, 5.3658, 5.155437, 6.92275, 6.718375, 9.01025)
a = kpu.init_yolo2(task, 0.5, 0.3, 5, anchor)
while(True):
    img = sensor.snapshot()
    code = kpu.run_yolo2(task, img)
    if code:
        for i in code:
            print(i)
            a = img.draw_rectangle(i.rect())
    a = lcd.display(img)
a = kpu.deinit(task)
Test it on the device
This will run test.py on the device immediately, without saving it to the device.
ampy --port /dev/ttyUSB0 -d 0.5 run test.py

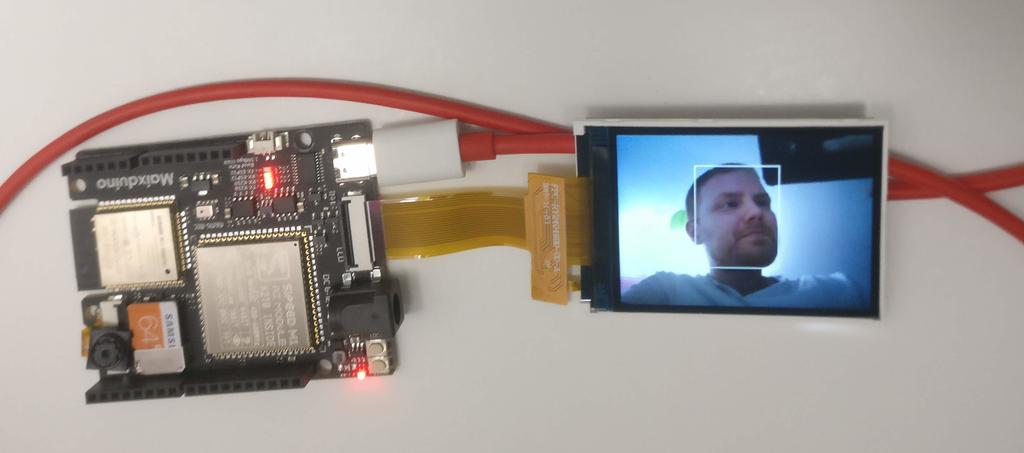
Success!! Now that it works, let's transfer it to the device.
Transfer it to the device
For test.py to load automatically when the device is powered up, we'll need to transfer a copy to the device and create a boot script that loads it.
ampy --port /dev/ttyUSB0 -d 0.5 put test.py /flash/test.py
Make a local backup of the existing boot.py, and replace it with one that will automatically load test.py on boot
First, create the file boot.py and place it in the project folder:
boot.py
with open("test.py") as f:
    exec(f.read())
Next, let's backup the copy of boot.py that was included on device:
ampy --port /dev/ttyUSB0 -d 0.5 get /flash/boot.py > ./backup/boot.py
and replace it with our new one:
ampy --port /dev/ttyUSB0 -d 0.5 put boot.py /flash/boot.py
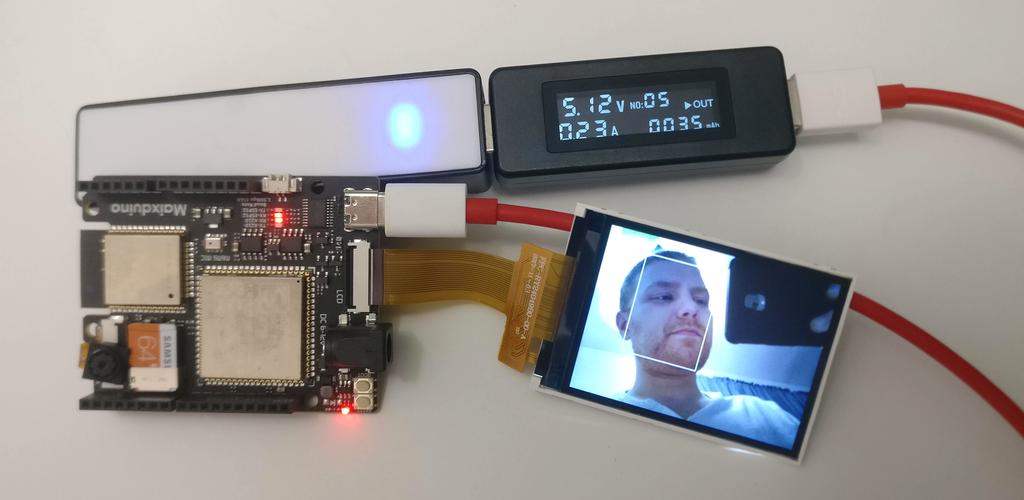
To check whether this worked, I unplugged it from the computer and plugged it into a powerbank.

Great!
Closing
Here, I took a first look at the Maixduino kit, got one of the demos working, and learned a little about the toolchain. In general, I was impressed. The documentation is reasonably good, albeit a bit rough at times, but the hardware seems capable. Any points lost in documentation are gained back by its use of open source software (making it easier to find answers than otherwise) and in that Seeed Studio has built a number of other products around the same module (suggesting a commitment to the product line).
It's definitely worth checking out!
Links
Product Pages
- Maixduino Dev Kit Product Page
- Sipeed M1 Module Product Page, with and without WiFi
Documentation
- MaixPy Firmware Documentation and Github
- Maixduino Firmware Documentation and Github
- Description of kfpkg files
Software
- ampy – The Adafruit MicroPython Tool
- kflash.py – Kendryte K210 UART ISP Utility for flashing firmware
- kflash_gui – GUI for kflash.py
- MaixPy Face Detection Demo
- Kendryte K210 Datasheet – the chip around which the Sipeed M1 is built
- Kendryte Model Compiler
- Kendryte Tensorflow Workspace
To leave a comment below, sign in using Github.