On a never-ending quest to learn to make everything, I bought a used wood lathe on Craigslist. Shortly thereafter, I found a set of lathe chisels at the local flea and was off to the races. Well, not quite. Shortly after that, I found my metal lathe at a garage sale—the tool I was looking for in the first place—and jumped right into using it. And so the wood lathe sat for a while, loved but untouched.
Many months later, I saw this video from Jimmy Diresta, and was inspired. This was right after Hurricane Irma, and the truckload of reclaimed horse stable hardwood that I had used to board up my parent's house, donated by a generous friend, needed to come down. Those boards had the rustic character perfect for project like this; they were worn, partially painted, and discolored by years of sun and rain, but solid.
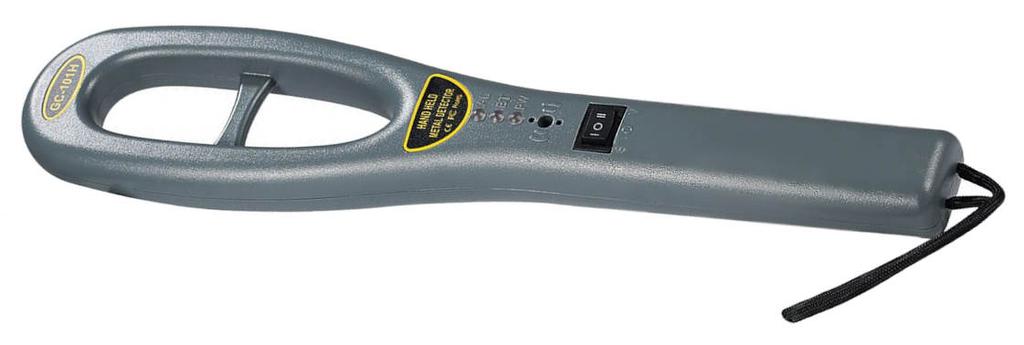
Before I got started—and this is important—I pored over them with a hand-held metal detector. Like every piece of reclaimed wood I'd come across, these boards were chock-full of old nails and screws—rusty, eroded, and missing heads—some of which I'd have missed if I had only looked by eye. And I really didn't want to find out about these by hitting them with the tablesaw or router.
I also cut away any rot with the table saw and ran them through the surface planer for a few passes to normalize their thickness (to varying degrees; those used for the top were left nearly untouched to preserve their existing character).
Legs
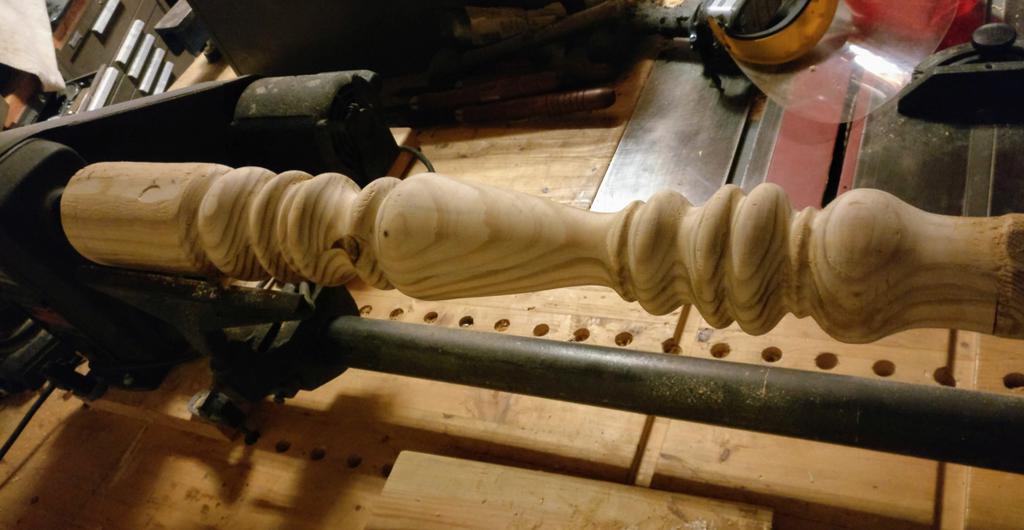
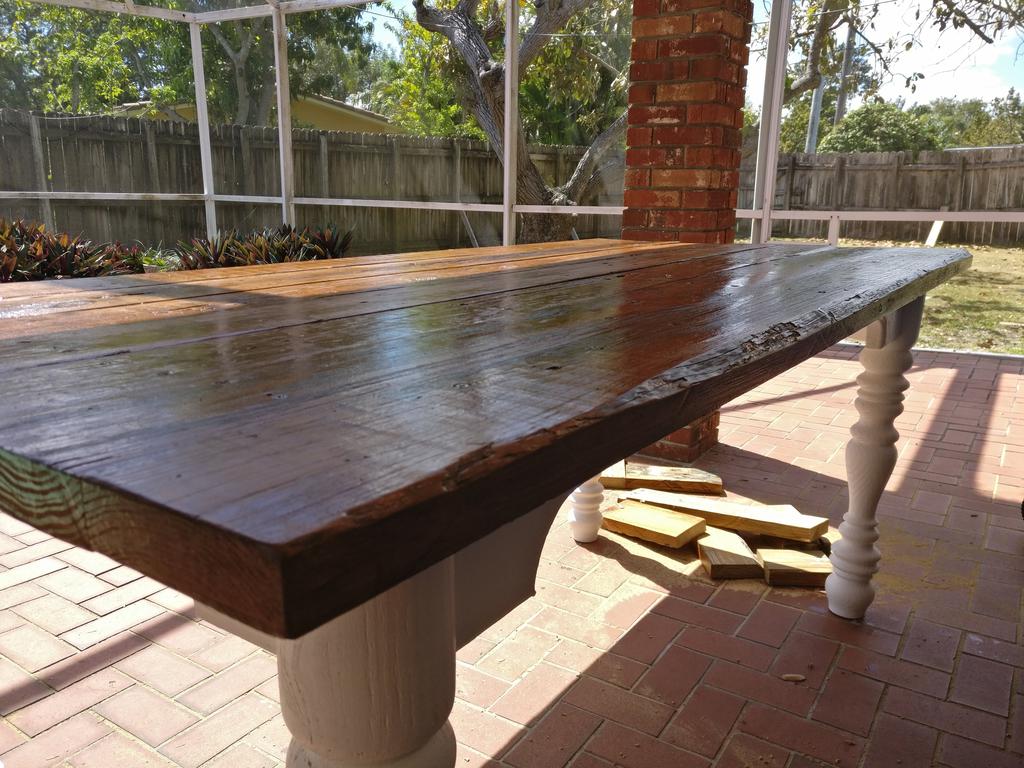
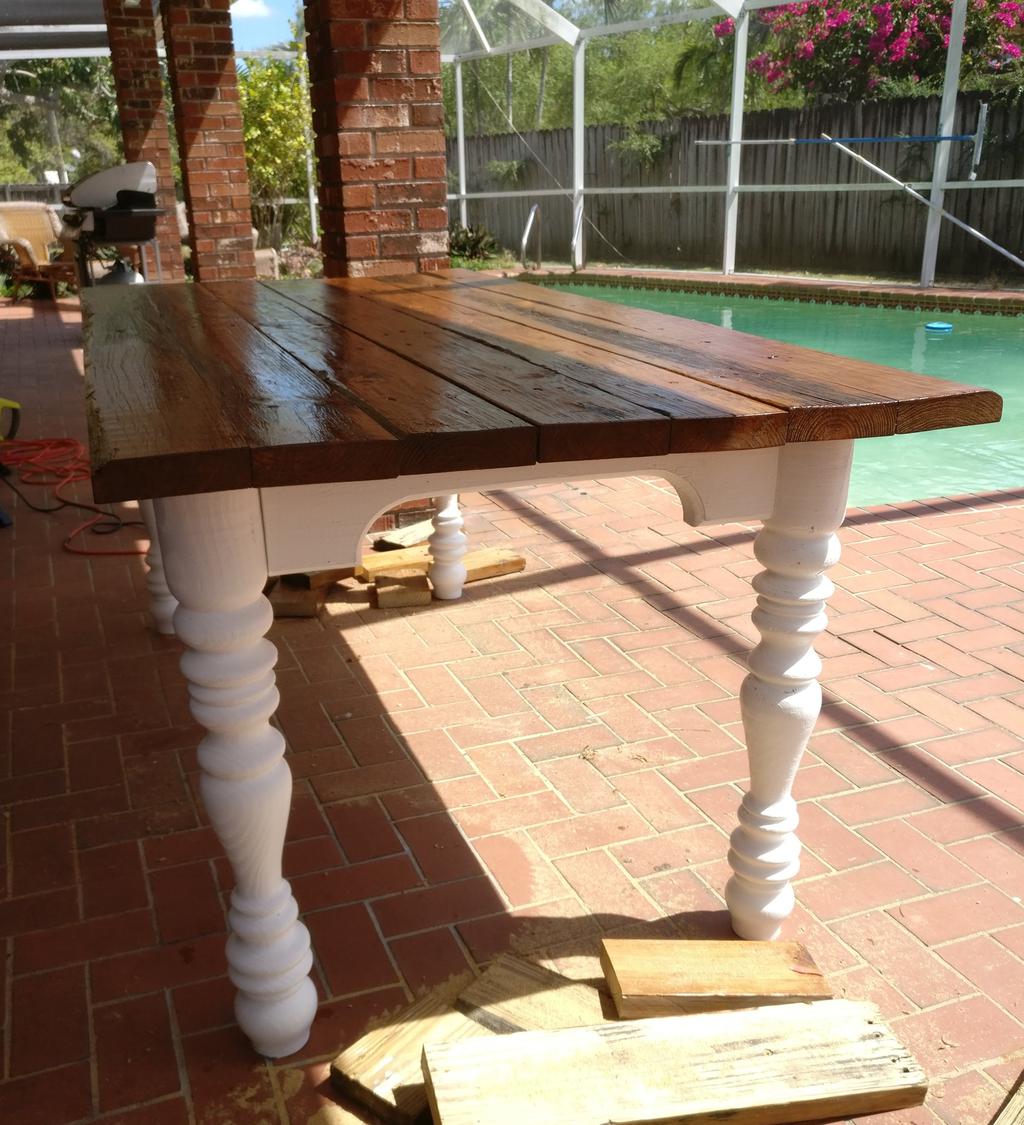
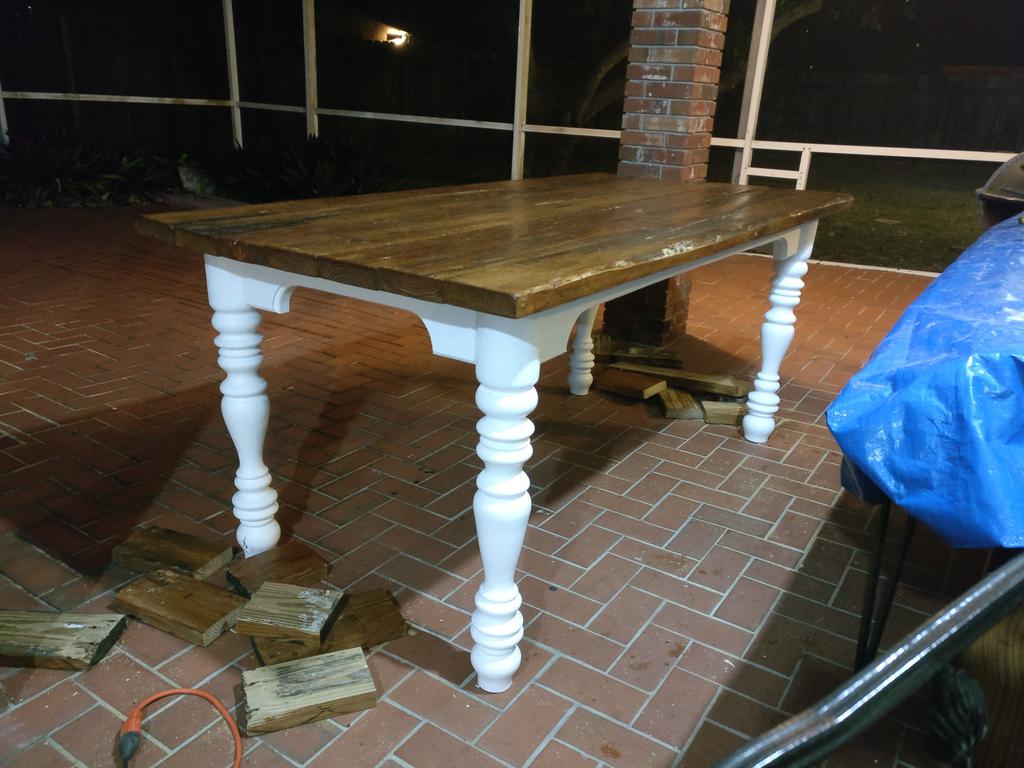
Most of the boards were either 2x6s or 2x8s (which, depending on the type of wood, vary between 1-1/2 and 2 in. thick), and none were thick enough to turn into legs on their own, so I had to glue several together to create the blank for each leg.
To do this, I binned the boards by grain density (under the assumption that those most-similar in grain density would expand most-similarly between seasons), used a jointer and surface planer to make them flat and parallel for gluing, trimmed the edges with the tablesaw so that the blanks would have the same width and height once glued, and glued them with Titebond III (my go-to wood glue), applying as many clamps as I could manage to ensure a tight bond.
After this, I clamped them into the wood lathe (faceplate on one end, live-center on the other), and began to shape them, free-form. After shaping them into cylinders, but before cutting into them further, I used a pencil to mark roughly where I wanted to make cuts (while they spun), roughly matching each leg to the one before it. They aren't all identical, but I didn't make that a real priority either. After shaping them, I cut a bit off the top and bottom of each to bring them to the correct length, and brushed on a few coats of white satin latex outdoor paint.

Having never used a wood lathe before, here's a few takeaways:
- Make sure that the wood lathe is securely mounted to something heavy and steady (or that it's bolted to the ground), and that your part is securely mounted to that, before you start. It doesn't take much imbalance for everything to start jumping around.
- Take small passes, especially when you start and your stock isn't cylindrical.
- Wear a face shield. Underneath that, wear safety goggles, a mask or respirator, and hearing-protection. Also wear an apron if you have one, and pants that cover your ankles. Half of those are to save your life, the other half are to keep the sawdust away from places it doesn't belong.
- Maintain good ventilation, and preferably, use a dust extractor (something I definitely need). You'd be amazed at how cloudy the air can get if you don't.
- Give yourself plenty of room to get out of the way if you have to. While turning one of the legs, the faceplate provided to me by the previous owner broke, sending the leg flying through the air. I wasn't hurt, and I somehow managed to catch the leg (so neither was it), but it definitely made me step back and reflect for a bit. Again, always wear safety gear!
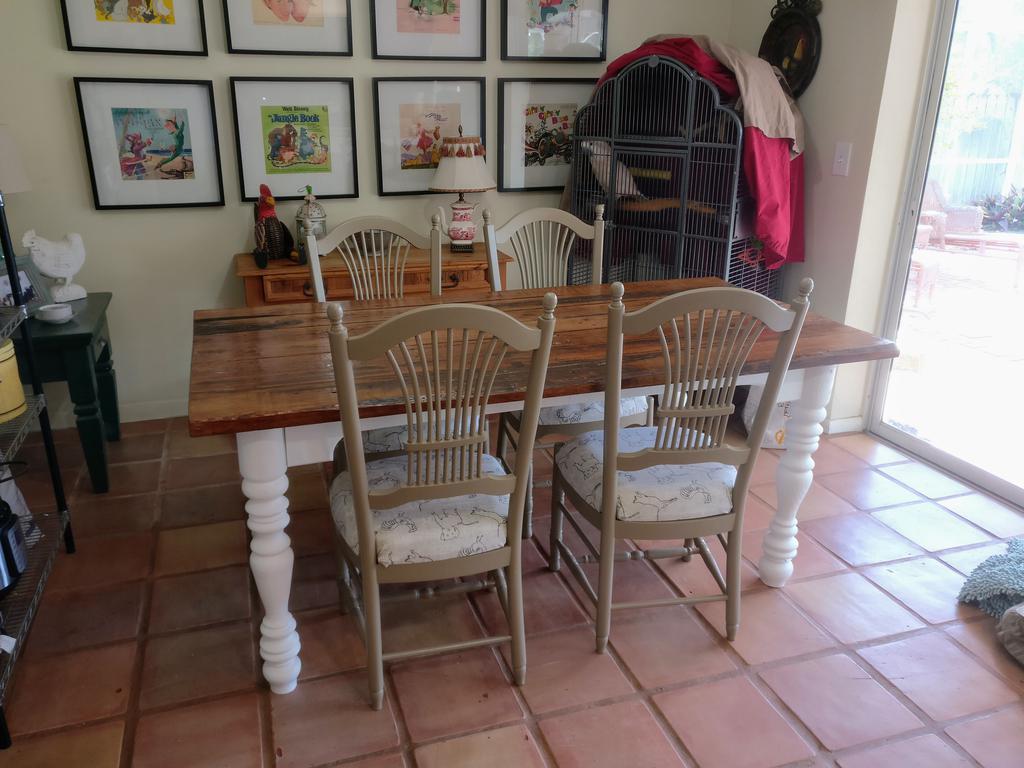
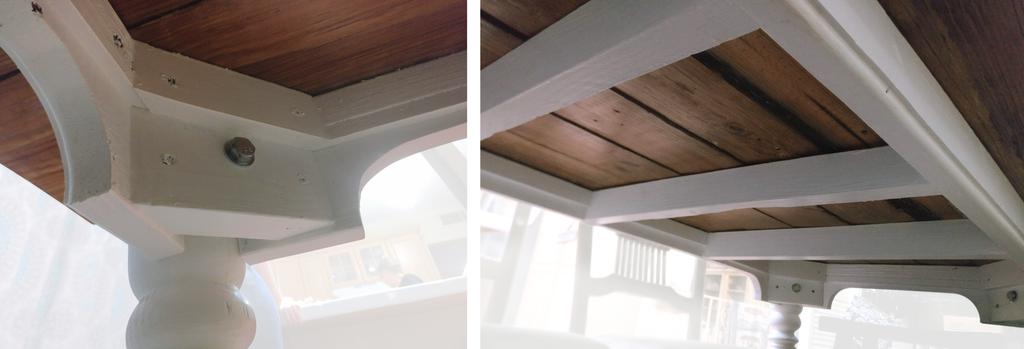
Frame
I didn't stray very far from what Diresta did in the video linked above, so I won't go into too much detail about the frame. I don't have a finish nailer, so I used glue and screws instead, but I did hand-route all of the trim from the same wood as the rest of the table. The frame was painted using the same white satin paint as the legs.
Top
Among the longest of the remaining boards, I picked 7 that were reasonably-flat and that had plenty of character, including two that still had a bit of live-edge (which I would use for the 2 longest edges of the table). Laying these out on a tarp, I applied several coats of Minwax PolyShades polyurethane (with red oak colored stain, to darken and slightly normalize the coloration) to each side with a natural-bristled brush.
After these dried, I arranged them atop the table and screwed them down to the frame. Using a large framing square, I marked a straight line at each end of the top (where I wanted the tabletop to end), and cut the ends square with a circular saw. After applying polyurethane to the newly cut edges, and waiting an additional 24 hours for it to air out, I was done.
To leave a comment below, sign in using Github.