Let's talk about rust

It's no secret that I love garage sales. Over the last few years, weekly garage sailing has allowed me to significantly bolster my workshop without weighing too heavily on my wallet.

One caveat to this is that some of the tools and equipment that I've bought have been rusty, either by age or neglect. In dealing with this, I've picked up a few tricks for removing rust, so I thought I'd share some of these here for others to benefit from.

WD40/Mineral Spirits

For very mild removal of very minimal surface rust and grime, I like to use an old rag (and an toothbrush for hard-to-reach areas) to wipe the item with either WD40 or odorless mineral spirits. The odorless mineral spirits (which is a bit viscous) can be left on the item to soak for some time before scrubbing, but won't do anything for the rust if it's allowed to dry.

If this doesn't do the job, a nylon-bristled brush or brass-bristled brush can be used for light scrubbing, though if it comes to this, it's usually easier to move on to vinegar (which I wouldn't recommend for something with moving parts, like a ratchet, unless it can be fully disassembled first).

White Vinegar (or Diet Coke)

For anything more than light surface rust, especially if I don't want to risk damaging the item with a wire wheel, I will soak it in vinegar. For this, I use undiluted white vinegar (standard 5% w/v grocery store stuff) with salt dissolved until saturated at garage temperature (usually around 90°F here). From what I understand, the salt here acts as a descaling agent to speed up this process, and though I haven't empirically tested its effectiveness against vinegar alone, it does seem to help. If Diet Coke (or generic) happens to be cheaper than vinegar on a given day, I'll use that instead; it works just as well. Why Diet Coke? Even the ants don't like it!

For minor surface rust, I might submerge an item for as little as 1 hr. The longest I routinely go is 24 hrs (though I've gone as long as 48), and I have not seen any pitting or discoloration as a result. That said, a long soak in vinegar will damage chrome plating/paint/powder-coating if it is already starting to flake; I haven't had issues doing this with chrome-plated tools when the chrome is uninterrupted, though these usually get closer to 1 hr of soaking than 24 hrs. Be sure to clean any oil or grease from the item before soaking, as it may significantly slow down the process.

During the vinegar soak, I'll periodically brush the tool using a nylon or brass brush, to remove any rust that has already loosened, while keeping it submerged. If I'm not yet satisfied with the results, I'll leave in vinegar for longer, brushing it occasionally as needed. If you see the tool bubble, you know it's working.
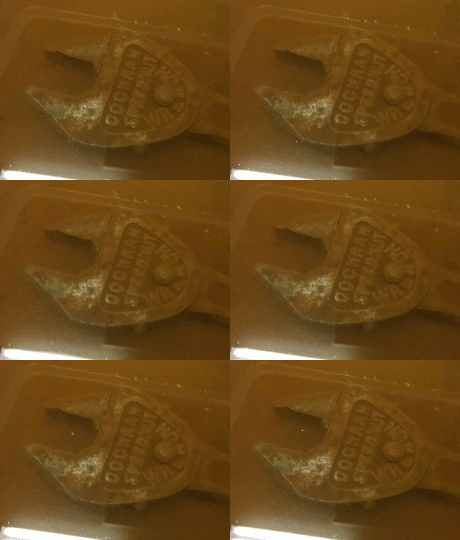
Rust bubbling away...

Immediately after removing the tool from vinegar, I drop it into another bath containing washing soda (Sodium Carbonate, Na~2~CO~3~) and dish soap for a few minutes, making sure to circulate the water a bit while it's in there. This base neutralizes the vinegar and prevents flash rusting.

I then take the tool from the second bath, rinse thoroughly under running water, and dry immediately, using WD40 or some substitute to displace any trapped water. Most tools then get a thin later of Johnson's Paste Wax (magical stuff) for further protection, and Super Lube (or other suitable lubricant) if it has any moving parts.

I use shoebox-sized plastic containers for this, and usually wait until I have at least a handful of tools to clean up.

Note: I've heard Evapo-rust is also quite effective, but don't really see any advantage to using that over vinegar or diet soda.

Wire Wheel

If the item is too rusty to be soaked in vinegar, of if the coating is beyond salvage, I might move forward to using a fine-bristled wire-wheel (brass is is much less harsh than steel, but a fine-bristled steel wheel can work), in a drill, on an angle-grinder, or mounted to a bench grinder. This can be dangerous for several reasons, and beyond that, can cause damage to an item very quickly, so I tend to use this technique sparingly.

Some precautions: - Don't wear gloves, as they can get caught in the wire wheel as it spins. Do wash your hands after you finish. - Hold the item with a firm grip, and always position it so that if you lose your grip, it is thrown away from (not toward) you. If you are not completely comfortable with your grasp of the item, either find another way to hold it, or do not proceed. - Wear a mask and goggles, and maintain plenty of air circulation (as with a large fan). It is not good to breathe the rust and metal dust that comes off of the items when doing this, especially if the item is galvanized or cadmium-plated (zinc and cadmium are exceptionally bad to inhale), and pieces of dust or metal may be thrown into your eyes if you aren't wearing goggles. Because of the potential toxicity, I avoid using a wire wheel on anything that I even suspect to be made or coated with these materials, and I strongly recommend that others do the same.

After using a wire wheel, I will finish the item with paste wax as if I had used vinegar, to protect from future rust.


These procedures are obviously not practical or desirable for everyone. I am a DIYer and use my tools once I clean them up. I enjoy the process of bringing them back to life, enjoy using them once I have done so, and love that by restoring them, I can rescue them from a landfill and become a small part of each tool's storied history. This is why it is worth it to me. It also doesn't hurt that rusty pieces of crap cost next to nothing.

As a final remark, remember to take appropriate precautions when using any of these techniques: if you don't want it on your tools, you definitely don't want it in your lungs!
Have something to say? Leave a comment.

Small Faraday Cage for Electrophysiology

Background

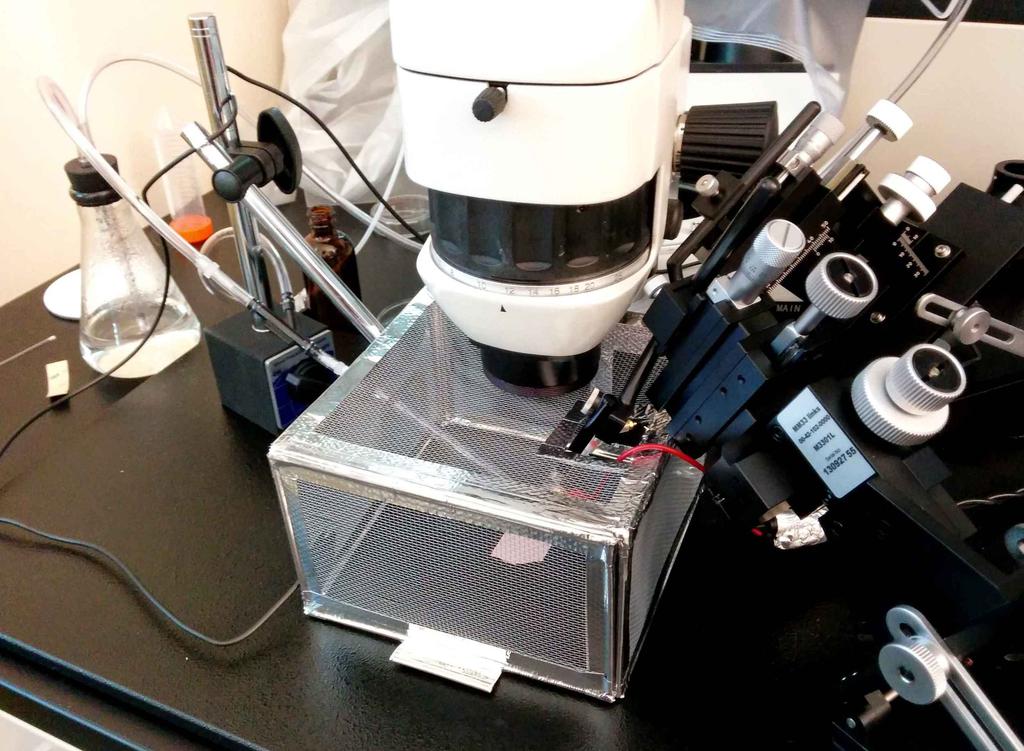
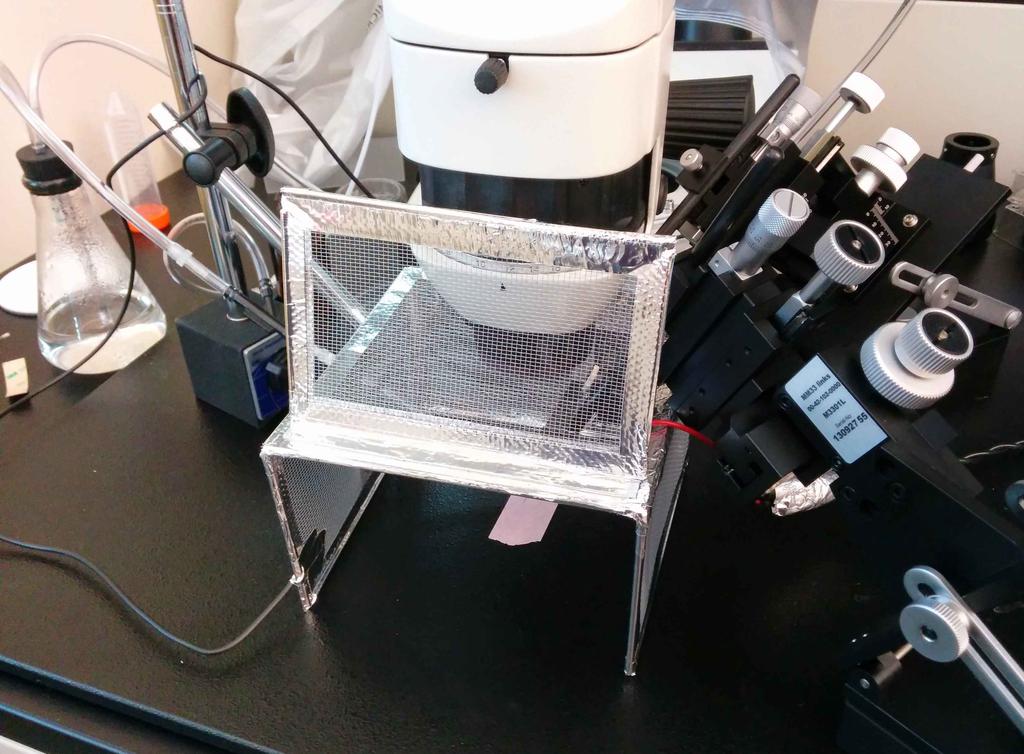
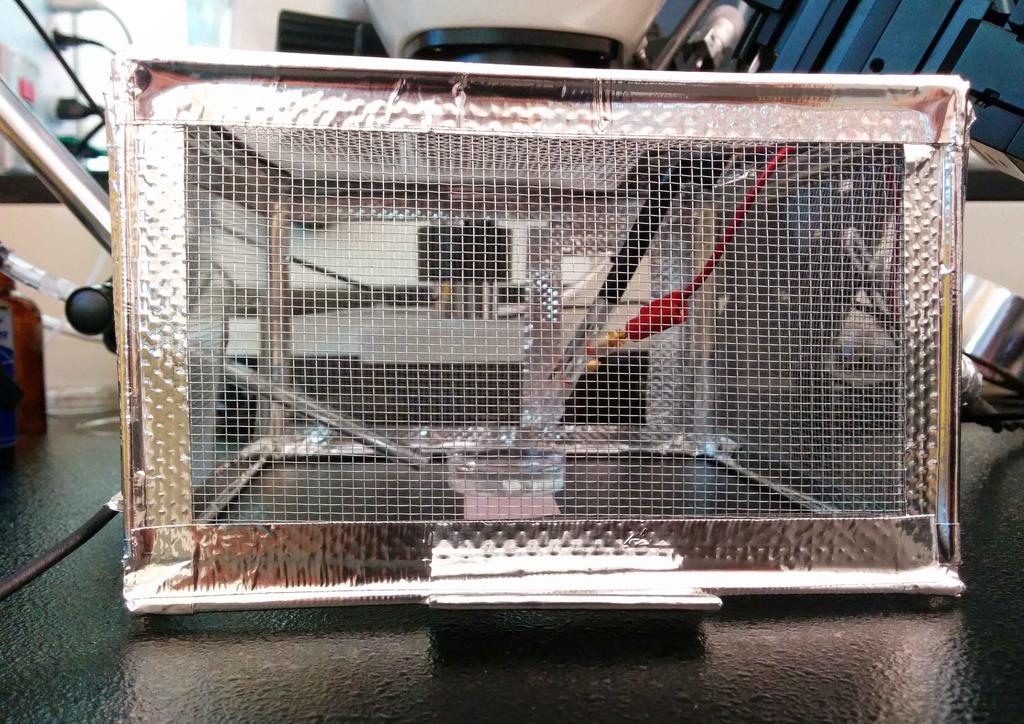
In setting up an electro-olfactography rig at work (using the commercial alternative to my uEOG, currently in development), I faced a noise floor higher than the signal I sought to record, consisting almost entirely of 60 Hz mains hum. After attempting to minimize this noise (e.g. by turning off the fluorescent lights, shielding the recording field with aluminum foil, grounding nearby metal) and determining that these alone would not be satisfactory, I decided to build a small Faraday cage. Here's what I built after a short trip to Home Depot, $25, and a few hours of work.

A Faraday cage blocks external electromagnetic radiation (like the aforementioned 60 Hz noise, often a problem when amplifying small signals) of frequency significantly higher than the diameter of holes in the walls of the cage. To attenuate 60 Hz hum, pretty much any fine mesh will do (a 60 Hz wave has wavelength λ = c/ƒ = (3x10⁸ m/s)/(60 Hz) = 5x10⁶ m) as long as it is thick enough and is sufficiently conductive.

Putting it together

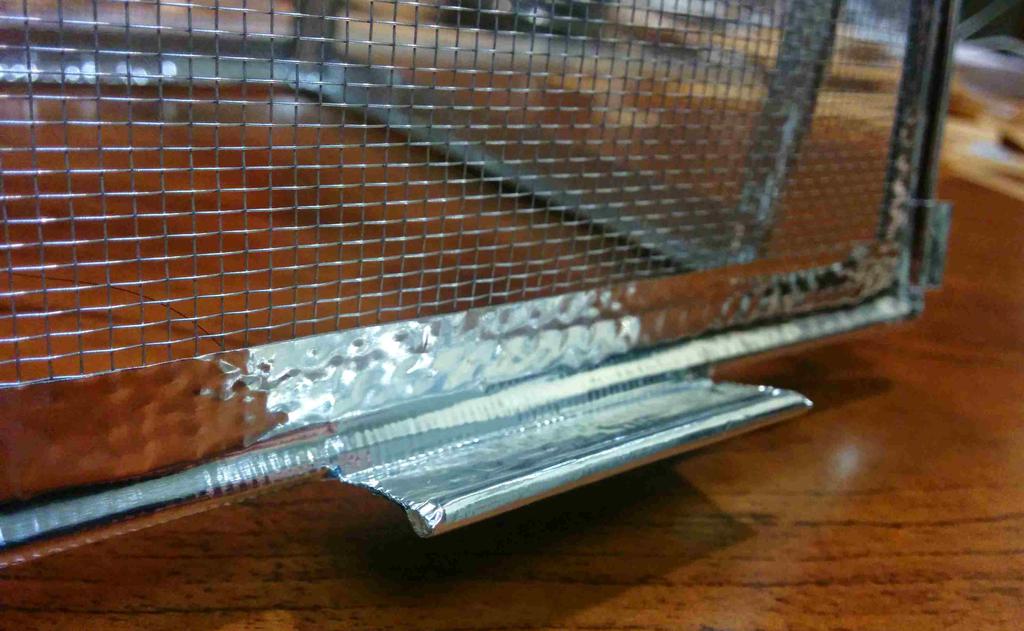
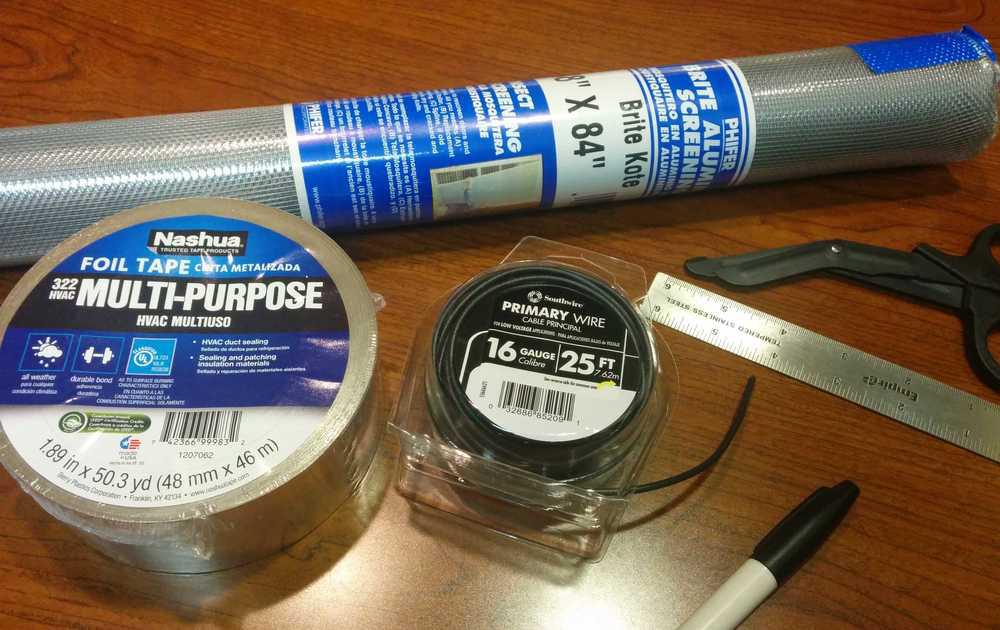
A stroll through Home Depot revealed two main options: galvanized steel chicken wire of various mesh sizes (1/4and 1/2), and aluminum insect screening with rectangular holes of around 1.5 mm x 2 mm, both available for less than $10 for a 4' x 8' roll. Of these two, I chose the aluminum mesh, though either should have worked here. To seal the seams of the cage, I used aluminum foil tape, and for grounding, 16 ga stranded copper wire. The edges of the box (the only pieces of which I didn't buy at Home Depot) were made from 5" wooden cotton swabs (stripped of the cotton); bamboo skewers, among many alternatives, could have also worked here.

Materials

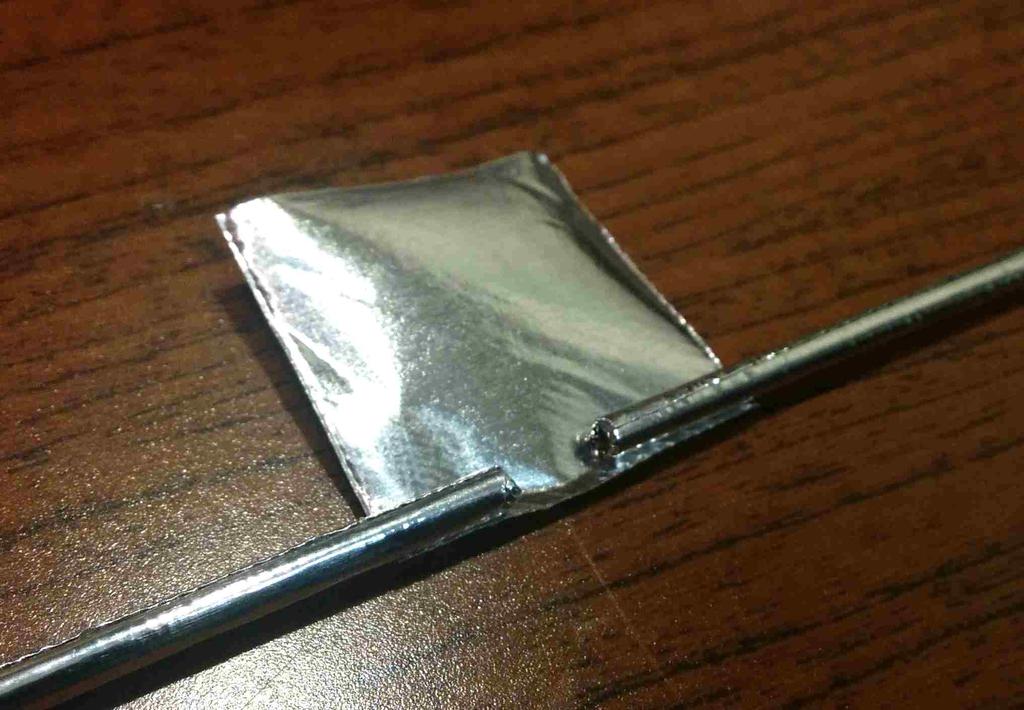
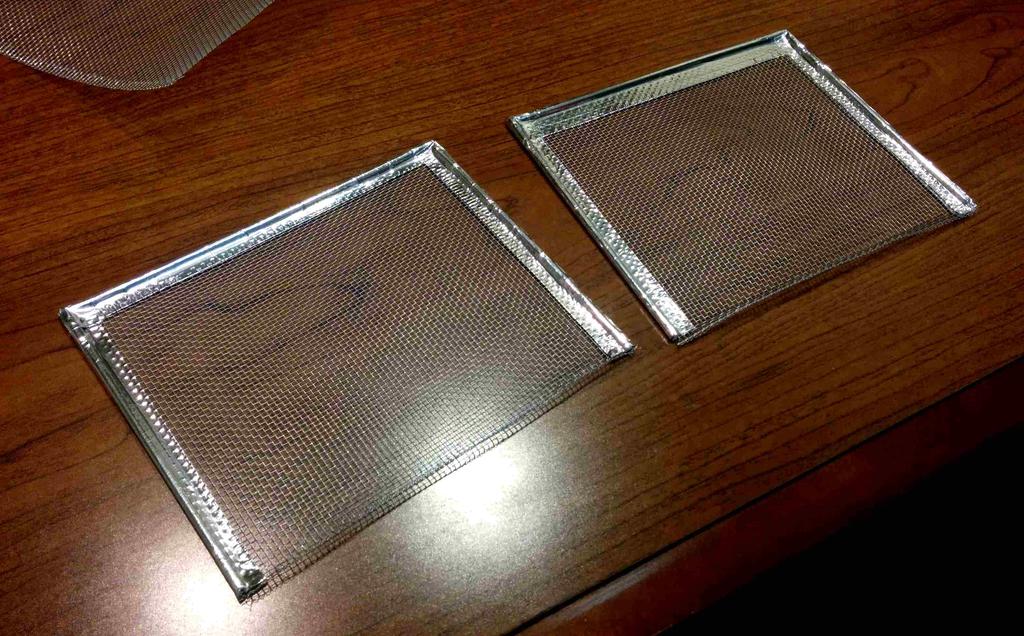
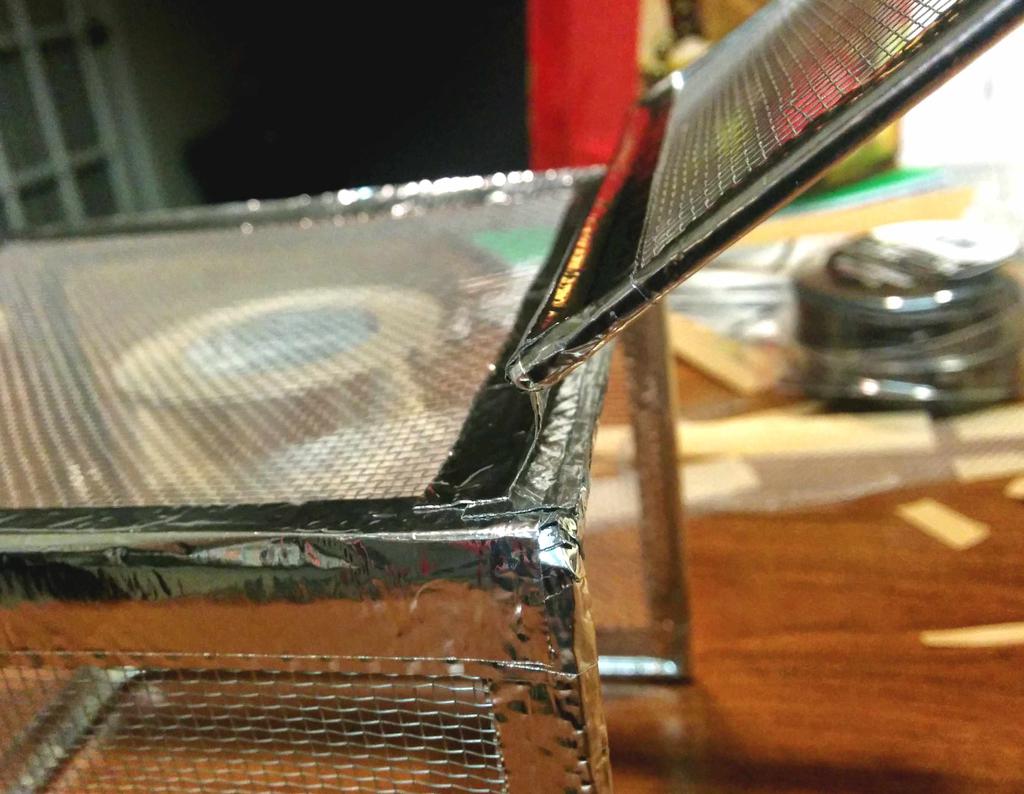
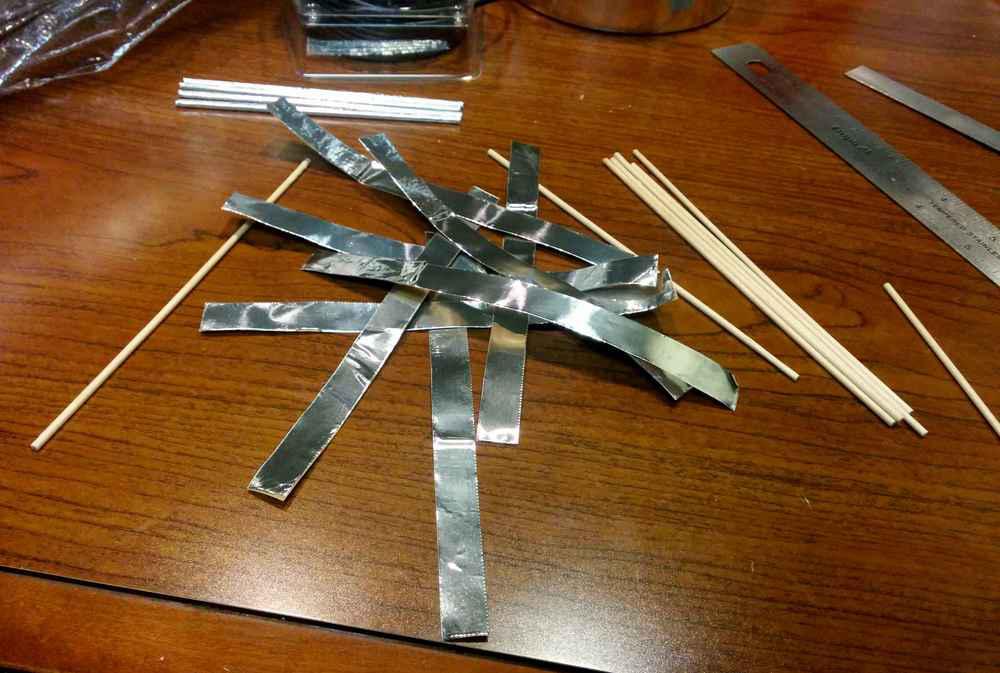
To start, I decided to make a (roughly) 3.5tall box with a 5 square footprint and hinged front-door. First, I cut the tape into strips, and wrapped them around the wooden sticks, which were cut into 5and 3.5 lengths. I did this to make them conductive; once the mesh is taped around this, all sides will be continuously connected. Edges of the cage were connected using small squares of the tape, wrapped around the ends of the sticks with about a 1/4gap between them, so that they could be bent at 90 degree angles. Because the adhesive of the tape might provide enough separation between the tape and mesh to be electrically insulating, the mesh for each side is over-sized so that it directly contacts the aluminum wrapped around each stick. For two of the sides, three sticks (3.5, 5, and 3.5) are connected in the same way, and taped to three sides of an over-sized rectangular section of mesh. These were then connected to the square frame made for the top, and mesh was taped to the top and back of the frame.

Tape rolled around corners before being bent

First corner of square bent

Sides of the cage

A small door was made for the front of the box in the same way, with a four-sided frame and a piece of mesh. This is in hinged to the box using a strip of tape, and a small handle is made with a piece of rod and more tape.

Hinge on door of cage

Handle on door of cage

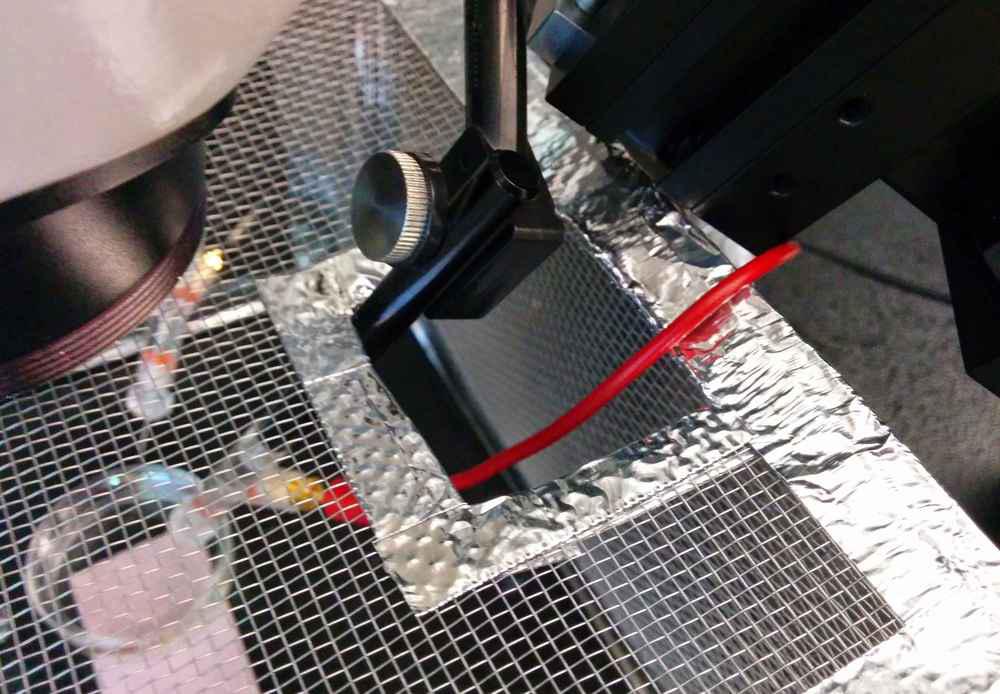
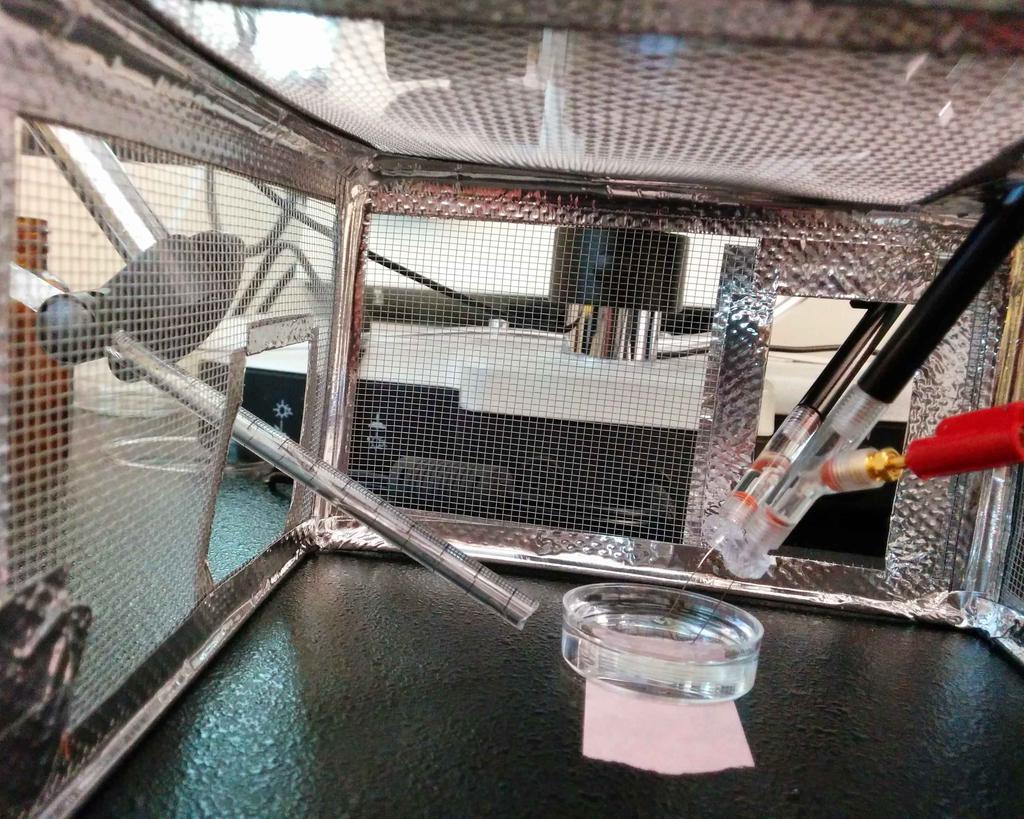
After taking this to work, I fit it under the dissection scope where it would rest, cut about an inch from the height, and cut access holes in the sides for the reference and signal electrodes, and for the air/odorant stream.

Access hole cut for signal electrode

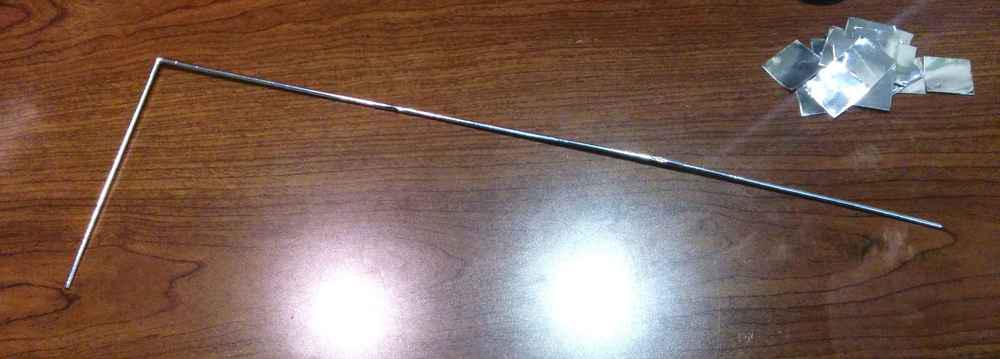
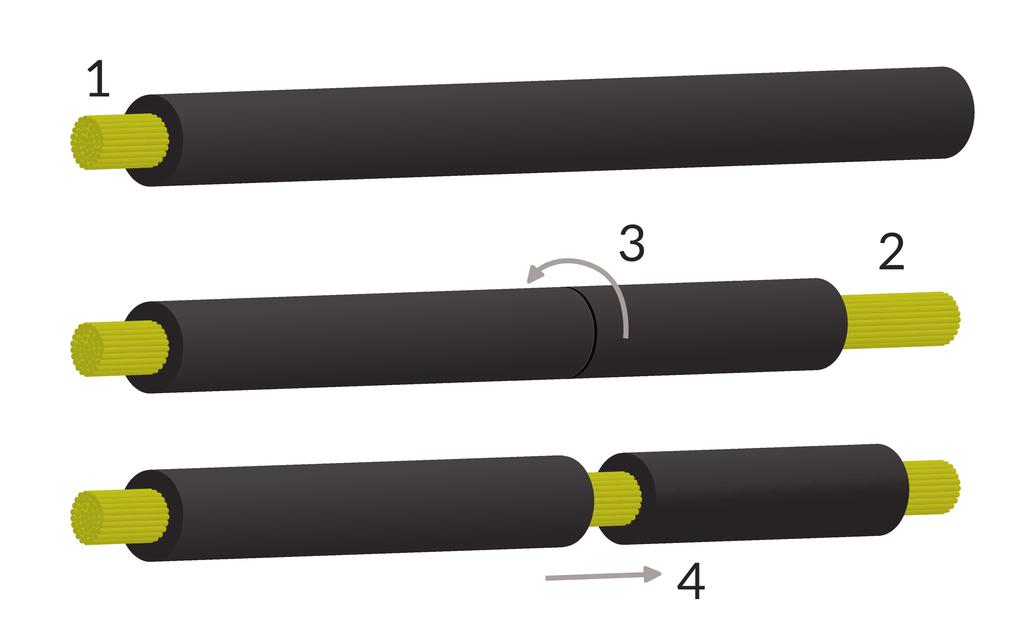
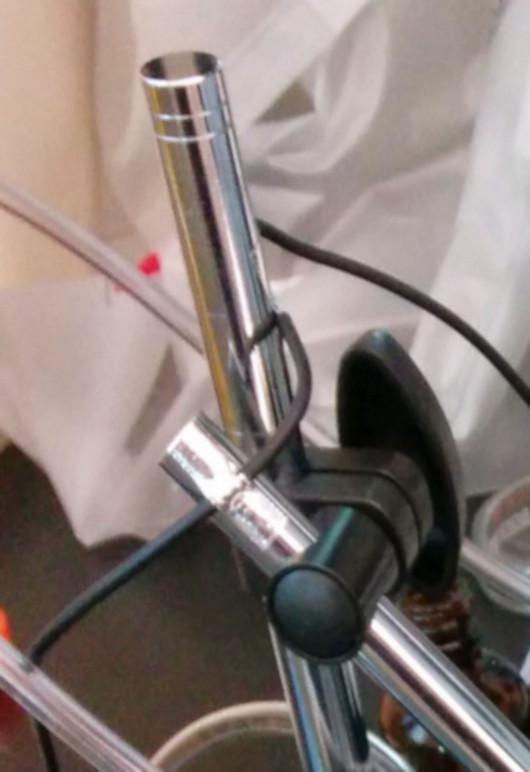
After fitting the cage to the recording area, I grounded the cage to (a bare spot of) the metal plate on which it sits, and this plate to the metal bench. After stripping several sections of a single segment of wire (see image below), I connected various floating portions of the setup (the boom of the dissecting scope, the micro-manipulator electrode holders, and the magnetic stand holding the air tube) to the same ground point.

Procedure for stripping section of a single wire:\n1. Strip one end of wire to expose desired amount of conductor,\n2. Strip other side of wire to expose twice as much wire,\n3. Cut slit in insulation using a sharp knife,\n4. Wrapping one end of the insulated wire around one hand (in this case, the left side), pull the insulation of the other end, exposing a section of conductor adjacent to where the slit was made.

Stripped section of wire taped to air tube support for grounding

Assessment

Using bare wires as electrodes (placed in a dish of Ringer's solution) I took a baseline recording, which I compared to a similar recording taken before installing the Faraday cage (with similar grounding). Beautiful! Installation of the Faraday cage immediately resulted in a 40 dB attenuation of the mains hum (100-fold decrease in amplitude), bringing it well-below the signal amplitude. And after narrowing down the source of some of the remaining hum to a particularly noisy power brick, and by adding some additional shielding, I was able to attenuate it by an additional >20 dB. With these tweaks in place, the noise now amounts to between 5 and 10 uV peak-peak at the recording site. Awesome!

Looking for further reduction of mains hum? Try a mesh with thicker conductors!

Have something to say? Leave a comment.

Improvised Rotary Tumbler for Polishing Parts

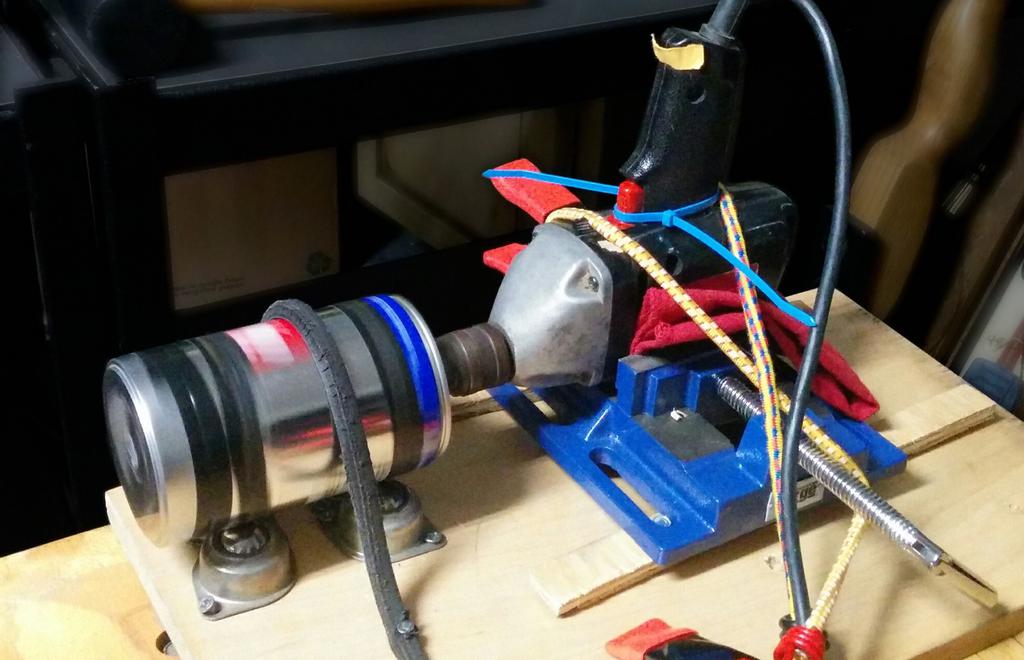
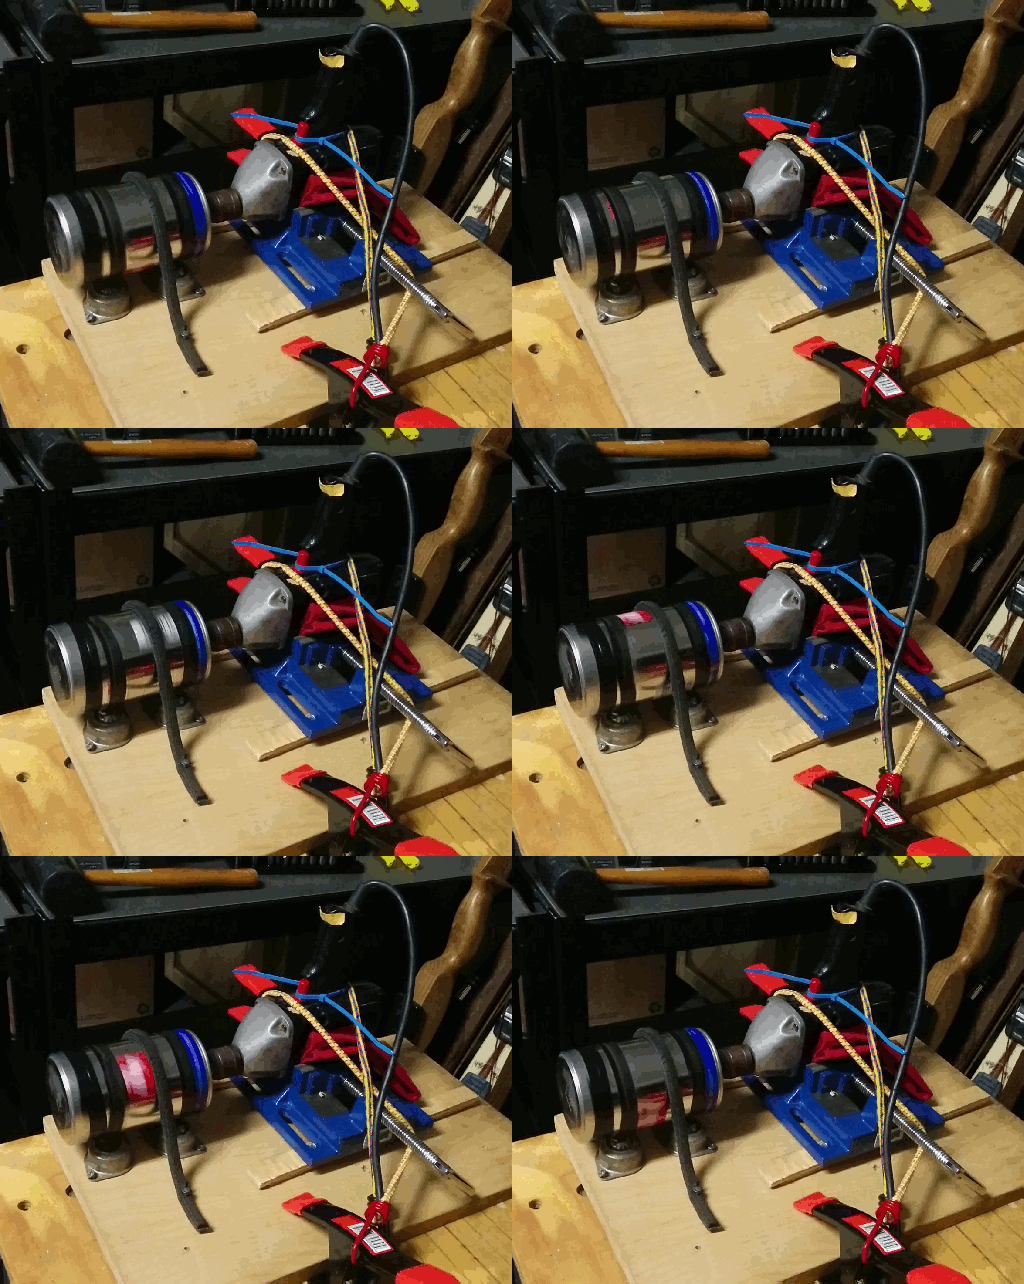
Needing to de-rust a handful of small parts in a hurry, I improvised this rotary tumbler. While this isn't my preferred way to remove rust from large or heavily rusted parts (more on that soon), it's a great way to clean up a bunch of smaller parts while you work on something else.

Grab a coffee can, and let's make a tumbler!

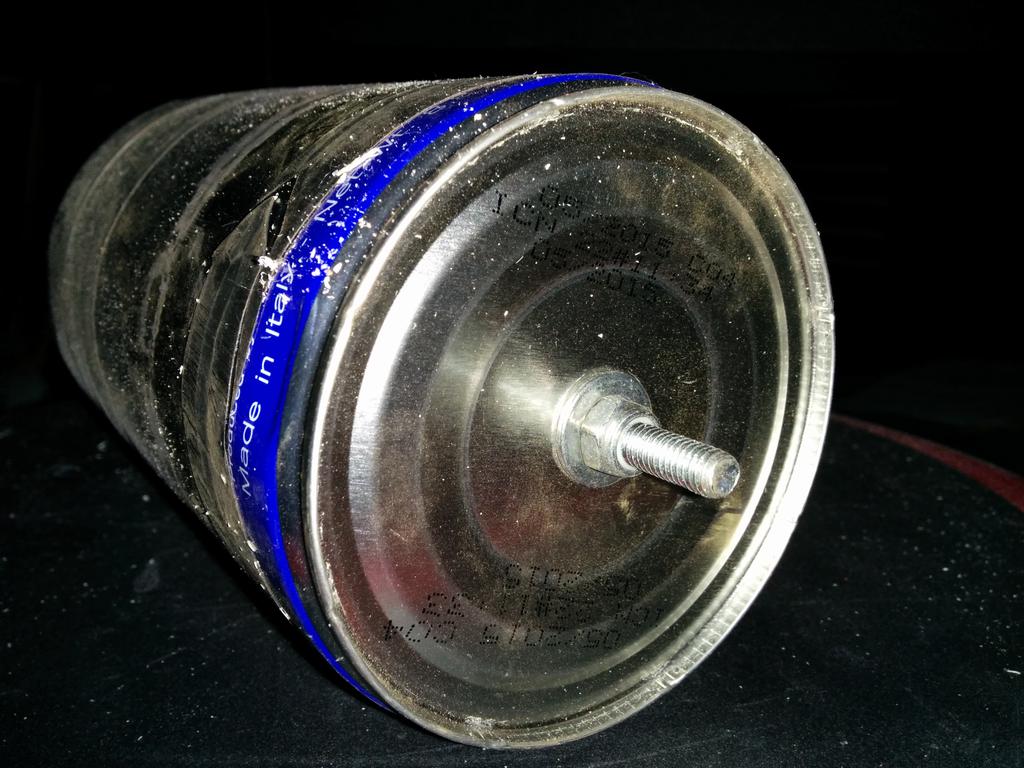
  1. Drill a hole into the base of a metal coffee can, doing your best to place it at the center. Pass a bolt through the hole you just drilled (see image to the right), and tighten it in place using washers (both sides of the hole) and a nylon-threaded lock-nut. If you don't have a lock nut, use a lock washer, or a regular nut and a bit of CA glue to keep it from backing off (and if you're worried, just be sure to spin the drill in the direction that would tend to tighten, rather than loosen, the nut).

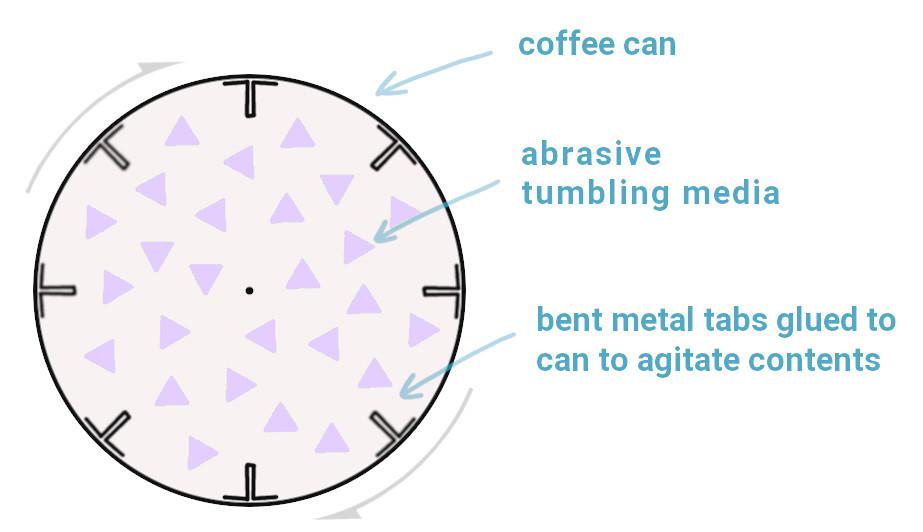
  2. Epoxy fins onto the inside of the can (I used strips of metal cut from another can) to stir items in the can as it spins.

  1. Place the items you want to polish in the can, along with some abrasive material (ready-made tumbling media, walnut-shells, sand, etc.), and seal it up. Be sure to leave some room in the can, so the contents can move around freely.
  2. Chuck the bolt into a power drill (a corded drill would be best for this), and find a way to secure both the drill and the can. You'll want the immobilize the drill and constrain the can, such that it can roll freely without bouncing around. I lightly chucked the drill into a vise, using bungee-cords to keep it from slipping out, and rested the can on 360°-casters, using a bit of old v-belt to keep it from jumping up and down.
  3. Zip-tie (or tape, rubber-band, etc.) the trigger of the drill so that it spins at a comfortable rate. Watch and wait!

Have something to say? Leave a comment.